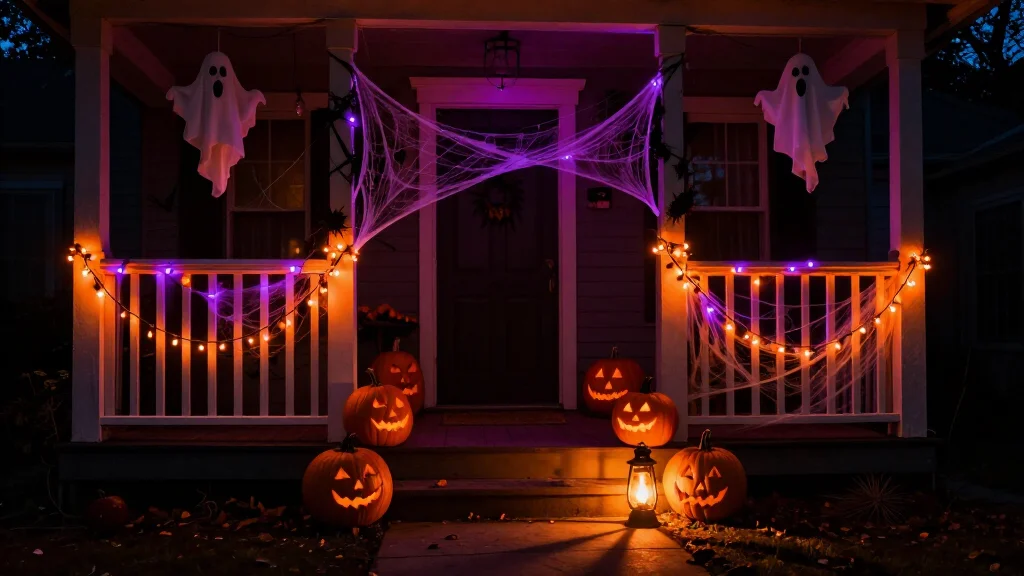

Halloween is just around the corner, and that means it’s time to get your spooky on! This time of year always reminds me of the excitement that comes with decorating your home and creating a haunted atmosphere. If you’re someone who loves to celebrate Halloween with thrilling decorations but doesn’t want to break the bank, this post is for you. I pulled together 25 DIY Halloween decorations that will bring all the spooky vibes without the hefty price tag.
Imagine transforming your space into a haunted wonderland filled with ghostly lanterns, creepy bats, and even a haunted mirror! These ideas are perfect for anyone looking to enhance their Halloween party or simply get in the festive spirit. You’ll find a variety of projects that are easy to tackle and can be completed in a weekend. From playful pumpkin balloon ghosts to eerie eyeball centerpieces, there’s something for everyone. Grab your crafting supplies and get ready to impress your friends and family with your DIY skills!
Key Takeaways
- You’ll discover 25 fun and spooky Halloween decoration ideas that are easy to make at home. - Each project is designed to be completed over a weekend, making them perfect for last-minute decorating. - The decorations range from simple crafts like pumpkin wreaths to unique items like mysterious potion bottles. - Many projects use inexpensive materials, so you can enjoy a frightfully festive atmosphere without spending a fortune. - Expect to have a blast crafting these decorations, and watch as your home transforms into a Halloween haven!Contents
- 1. Spooky Ghost Lanterns
- 2. Creepy Hanging Bats
- 3. Pumpkin Balloon Ghosts
- 4. DIY Witch’s Broomsticks
- 5. Eerie Eyeball Centerpieces
- 6. Ghostly Silhouettes
- 7. Pumpkin Wreaths
- 8. Spider Web Tablecloth
- 9. DIY Cauldron Centerpiece
- 10. Hanging Pumpkin Garland
- 11. Mysterious Potion Bottles
- 12. Batty Wall Art
- 13. Spider Lanterns
- 14. Ghostly Garden Stakes
- 15. Potion Ingredient Labels
- 16. Beware of the Haunted Mirror!
- 17. Broomstick Door Decor
- 18. Spooky Coffee Table Display
- 19. Fall Leaf Ghosts
- 20. Halloween-Themed Throw Pillows
- 21. Jack-O'-Lanterns with a Twist
- 22. Haunted House Silhouettes
- 23. Ghostly Table Runner
- 24. Spooky Welcome Signs
- 25. Haunted Photo Booth Backdrop
1. Spooky Ghost Lanterns
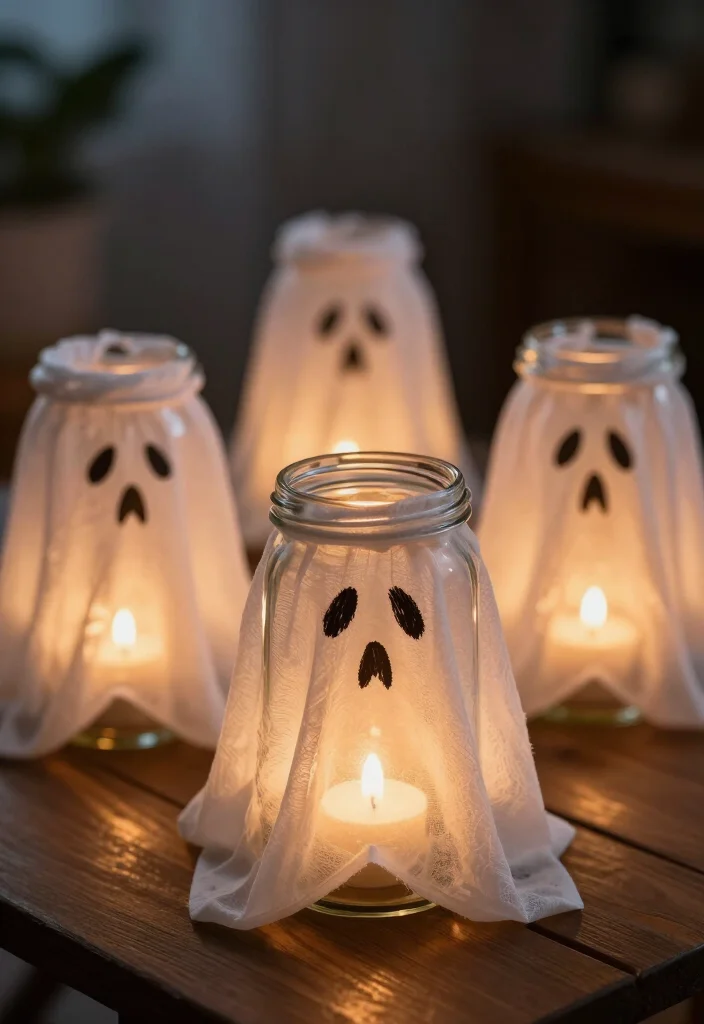
Illuminate your Halloween night with charming spooky ghost lanterns that are both easy and fun to make! All you need are a few glass jars and some white cheesecloth or fabric. Wrap the jars in the fabric, securing it with a rubber band and allowing some to drape down, creating a ghostly effect. Add a battery-operated candle or glow stick inside to achieve that perfect eerie glow that will enchant your guests.
These lanterns not only set a spooky ambiance but also offer a creative outlet for your decorating skills. Feel free to personalize them by drawing fun faces on the jars with a black marker. This project is adaptable, making it perfect for any gathering size!
Ingredients Needed:
- Clear glass jars
- White cheesecloth or fabric
- Rubber bands
- Battery-operated candles or glow sticks
Steps:
1. Wrap cheesecloth around the jar, forming a ghostly shape.
2. Secure the fabric with a rubber band, letting it flow down.
3. Draw spooky faces on the jar.
4. Place a candle inside.
5. Arrange them on your porch or table for impact.
This creative project will elevate your Halloween decorations, bringing a whimsical yet spooky flair to your home.
2. Creepy Hanging Bats
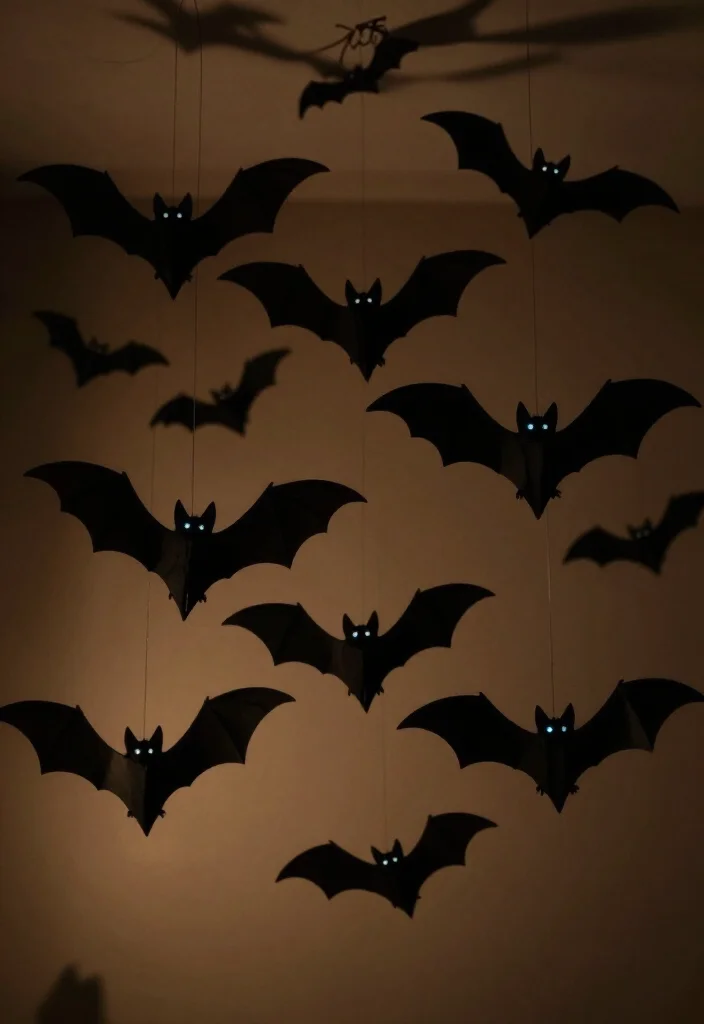
Set the mood for your Halloween festivities with these playful and spooky hanging bats! Made from simple black construction paper, you can easily cut out bat shapes to hang from ceilings or doorways. The more bats you have, the scarier the scene, so don’t hesitate to create a swarm!
For an extra touch of fright, consider varying the sizes of the bats and using fishing line or clear thread to give the illusion of them flying through the air. Add glowing eyes with small LED lights for an even spookier effect that will delight your guests!
Ingredients Needed:
- Black construction paper
- Scissors
- Fishing line or clear thread
- LED lights (optional)
Steps:
1. Cut out bat shapes from the black construction paper.
2. Use fishing line to attach them to the ceiling or doorways.
3. For glowing eyes, stick small LED lights just above the bats.
4. Arrange in layers for a dynamic flying effect.
With these bats hanging around, your space will be transformed into a haunted haven that everyone will love!
3. Pumpkin Balloon Ghosts
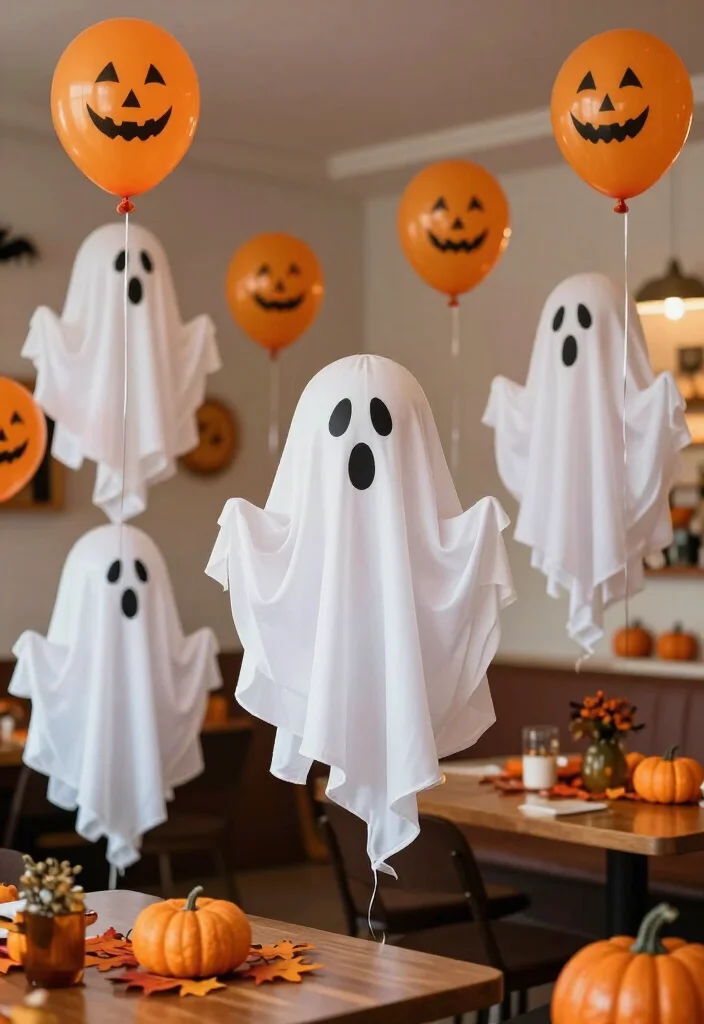
Get creative and transform simple balloons into delightful pumpkin balloon ghosts for your Halloween celebration! Inflate orange balloons and draw spooky faces on them using a black permanent marker. Then, take a white sheet and drape it over the balloon, securing it at the bottom with a string to create an adorable ghostly appearance.
These whimsical decorations can float around your party or be used as centerpieces that add a festive touch. For a fun twist, consider using helium to let them float gracefully around your space!
Ingredients Needed:
- Orange balloons
- Black permanent marker
- White sheet or fabric
- String
Steps:
1. Inflate the orange balloon.
2. Draw spooky faces with the marker.
3. Drape the white sheet over the balloon and tie it at the bottom.
4. Display them around your home or let them float freely!
These playful ghosts will surely bring smiles and laughter to your Halloween festivities!
Pumpkin Balloon Ghosts
Editor's Choice




4. DIY Witch’s Broomsticks
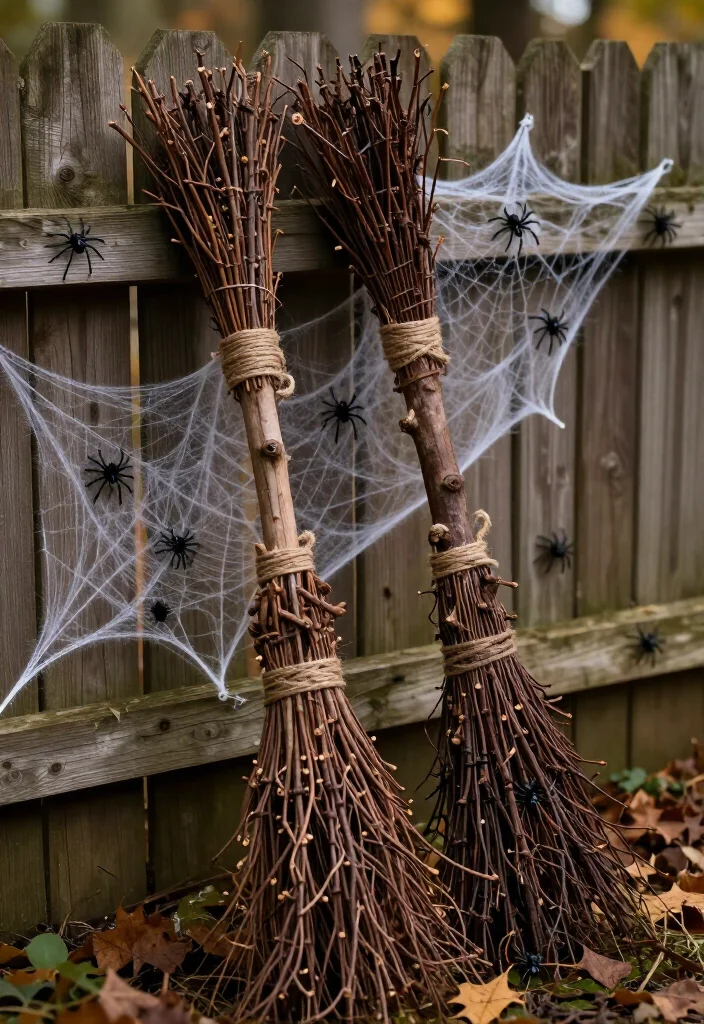
Add a magical touch to your Halloween decor with charming DIY witch’s broomsticks! Gather some twigs, a sturdy stick or dowel, and some jute twine to whip up this iconic decoration. Start by bundling the twigs together, securing them with jute twine, then attach the bundle to the stick for an authentic touch.
These brooms can be placed around your home or serve as whimsical centerpieces. For an extra spooky vibe, consider adding faux cobwebs or tiny spiders to complete the witchy look!
Ingredients Needed:
- Twigs
- Sturdy stick or dowel
- Jute twine
- Faux cobwebs (optional)
Steps:
1. Bundle twigs and tie them with jute twine.
2. Attach the bundle to the stick or dowel.
3. Trim any excess twigs for a neat finish.
4. Decorate with faux cobwebs if desired.
This enchanting addition will surely bring a smile and a touch of magic to your Halloween festivities!
DIY Witch’s Broomsticks make real magic out of simple twigs—who knew a few minutes could create game-changing Halloween decorations? Bundle twigs with jute, attach to a dowel, and dust them with faux cobwebs for instant spooky centerpieces and cozy nooks.
5. Eerie Eyeball Centerpieces
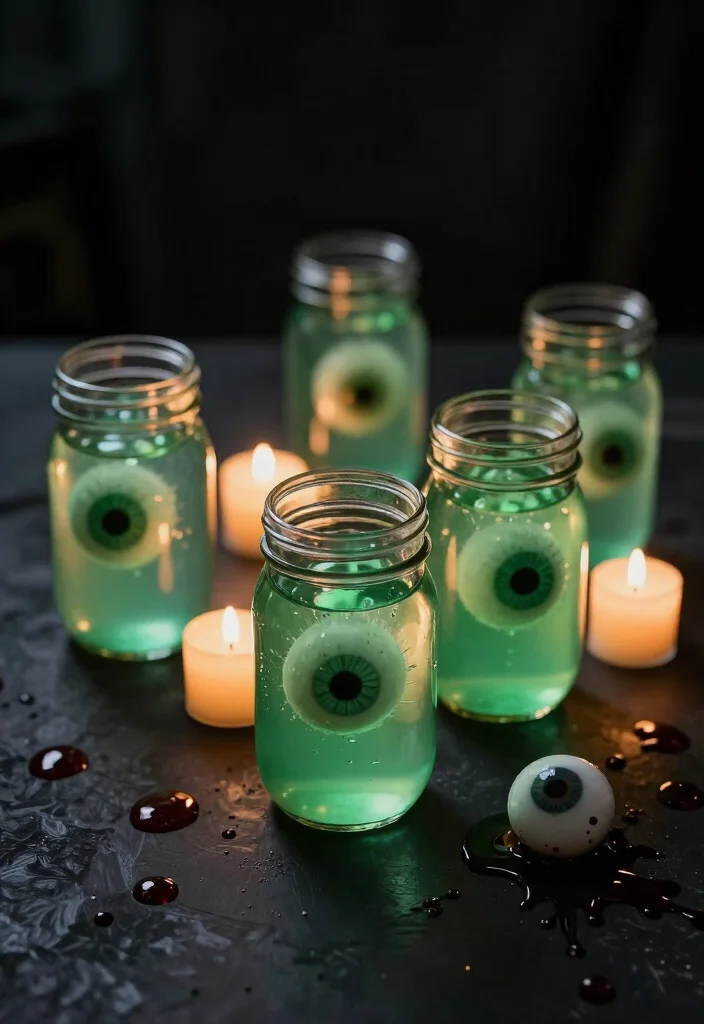
Elevate your Halloween tablescape with some eerie eyeball centerpieces that are guaranteed to be a conversation starter! Use plastic eyeballs or marbles painted with eye designs, placing them in mason jars filled with water and a few drops of green food coloring for a creepy effect.
Illuminate these spooky jars with LED candles to achieve a glowing, haunting look. For an added shock factor, sprinkle in some faux blood—your guests will be both terrified and amused!
Ingredients Needed:
- Plastic eyeballs or marbles
- Mason jars
- Water
- Green food coloring
- LED candles (optional)
Steps:
1. Fill mason jars with water.
2. Add drops of green food coloring.
3. Place eyeballs in jars.
4. Light with LED candles for an eerie glow.
5. Scatter faux blood drops around for a chilling touch.
These eye-catching centerpieces will create a fun yet spooky atmosphere that your guests will love!
Difficulty Rating & Requirements
Overall Difficulty Rating: MediumCreating these DIY Halloween decorations is a fun challenge that suits those with some crafting experience. While beginners can tackle many of the projects, a few may require more advanced skills, like precise cutting or painting techniques. If you enjoy working with your hands and have basic crafting supplies, you’ll likely find these projects enjoyable and manageable. Time Estimate:
⏱ Estimated time: 1-3 hours per project
Each decoration may take anywhere from one to three hours, depending on your experience and the complexity of the item. For example, simpler projects like pumpkin balloon ghosts can be completed quickly, while more intricate ones, like the haunted mirror, may require additional time for preparation and assembly. Skill Requirements:
- Required skills: Basic crafting skills, familiarity with tools like scissors, glue, and paint.
- Beginner-friendly: Yes, with explanation
Many of these DIY projects are beginner-friendly but may challenge you to learn some new techniques. For instance, creating spider lanterns may require some basic painting skills, while others like spooky coffee table displays are straightforward. You can easily learn necessary skills like cutting and gluing as you go, making this a great opportunity for beginners to expand their crafting abilities. Tools & Materials Needed:
🧰 Essential items checklist:
- Craft scissors (required)
- Hot glue gun and glue sticks (required)
- Paint and brushes (optional, depends on the project)
- Cardstock or construction paper (required)
- String or twine (optional, for hanging items)
- Black marker or paint (required for detailing)
- Balloons (required for projects like pumpkin ghosts)
- Craft knife (optional, for more detailed cuts)
Step-by-Step Overview:
1. Plan Your Decorations (30 minutes): Choose which projects you want to tackle. Gather inspiration and materials ahead of time to make the process smoother.
2. Preparation Phase (1 hour): Cut out necessary pieces, paint items, and prep any materials that need drying. This step is crucial for ensuring everything is ready for assembly.
3. Assembly Phase (1-2 hours): Follow the steps to put your decorations together. Some items may require gluing or drying time, so plan accordingly.
4. Finishing Touches (30 minutes): Add any final details or adjustments. This may include painting additional details or reattaching loose parts.
Professional vs DIY: Rough cost comparison
Hiring a professional decorator for your Halloween festivities could easily cost between $200 to $500, depending on the scale and complexity of the decorations. In contrast, creating these DIY projects can be done for as little as $20 to $100, depending on what materials you already have on hand. If you enjoy crafting and want a personalized touch for your Halloween celebration, going the DIY route can be both cost-effective and rewarding!
6. Ghostly Silhouettes
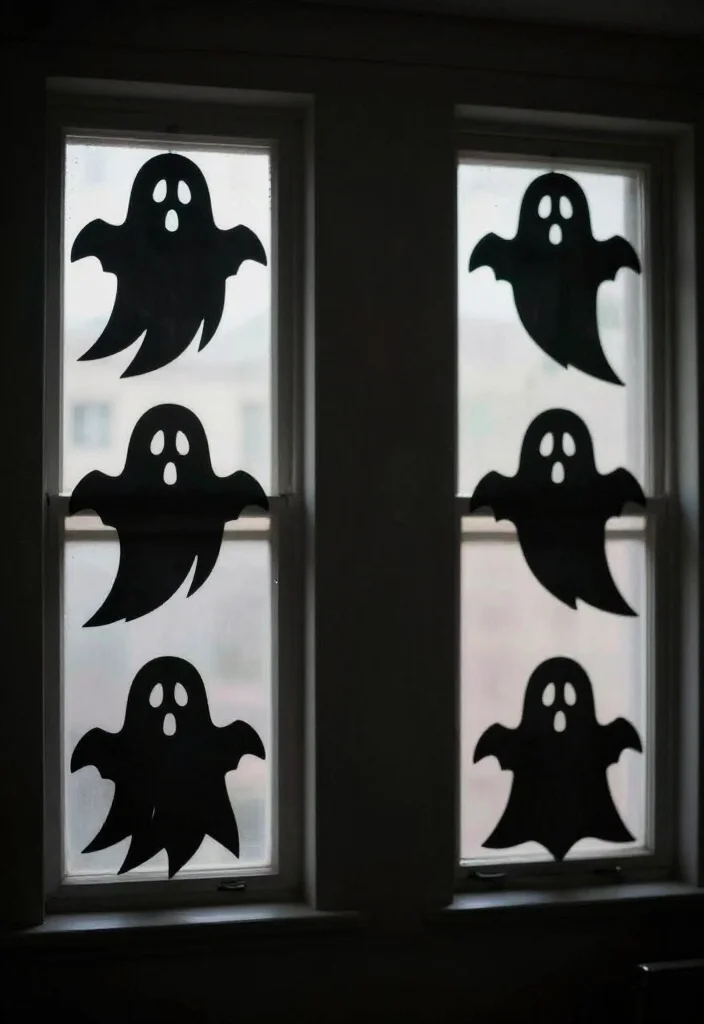
Create a mysterious atmosphere with ghostly silhouettes that will decorate your windows and walls! Simply trace and cut out ghost shapes from black construction paper. You can stick with classic ghost designs or get creative with unique shapes.
Once cut out, use tape to attach these silhouettes to your windows or walls, particularly in well-lit areas where they can cast spooky shadows. This decoration will give your home a haunted feel that’s both welcoming and eerie!
Ingredients Needed:
- Black construction paper
- Scissors
- Tape
Steps:
1. Draw and cut ghost shapes from the black construction paper.
2. Use tape to attach them to windows or walls.
3. Ensure they are placed in areas where lighting can create ominous shadows.
Your home will be transformed into a haunting haven that your guests will remember!
📹 Related Video: Glowing Chicken Wire Ghost 👻 DIY Halloween Props
7. Pumpkin Wreaths
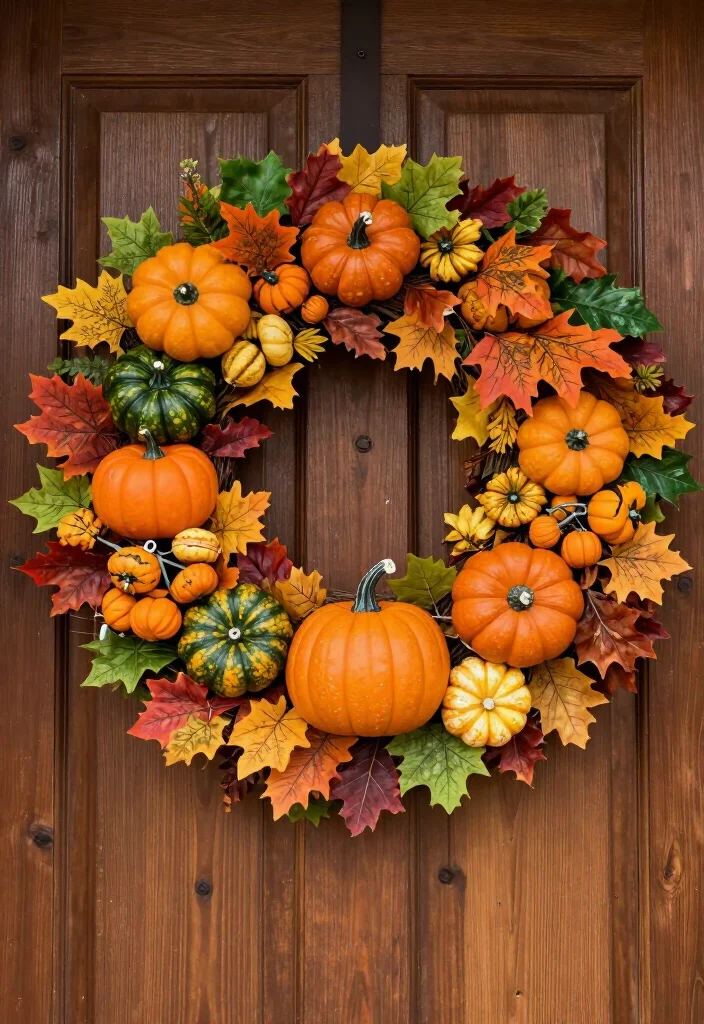
Welcome the fall season with a delightful pumpkin wreath that will brighten up your entrance! Create this charming decor piece using faux pumpkins, a wire wreath frame, and some autumn foliage. Start by attaching small faux pumpkins to the frame with hot glue, filling in the gaps with colorful leaves for added flair.
This wreath can be hung on your door or above your fireplace, making it a cheerful decoration that can be enjoyed all season long. Using a mix of colors and sizes will add visual interest and charm!
Ingredients Needed:
- Faux pumpkins
- Wire wreath frame
- Hot glue gun
- Autumn foliage
Steps:
1. Attach faux pumpkins to the wire wreath frame using hot glue.
2. Fill in gaps with autumn foliage.
3. Hang on your door or above your fireplace.
This festive wreath will create a welcoming atmosphere for your guests throughout the fall!
8. Spider Web Tablecloth
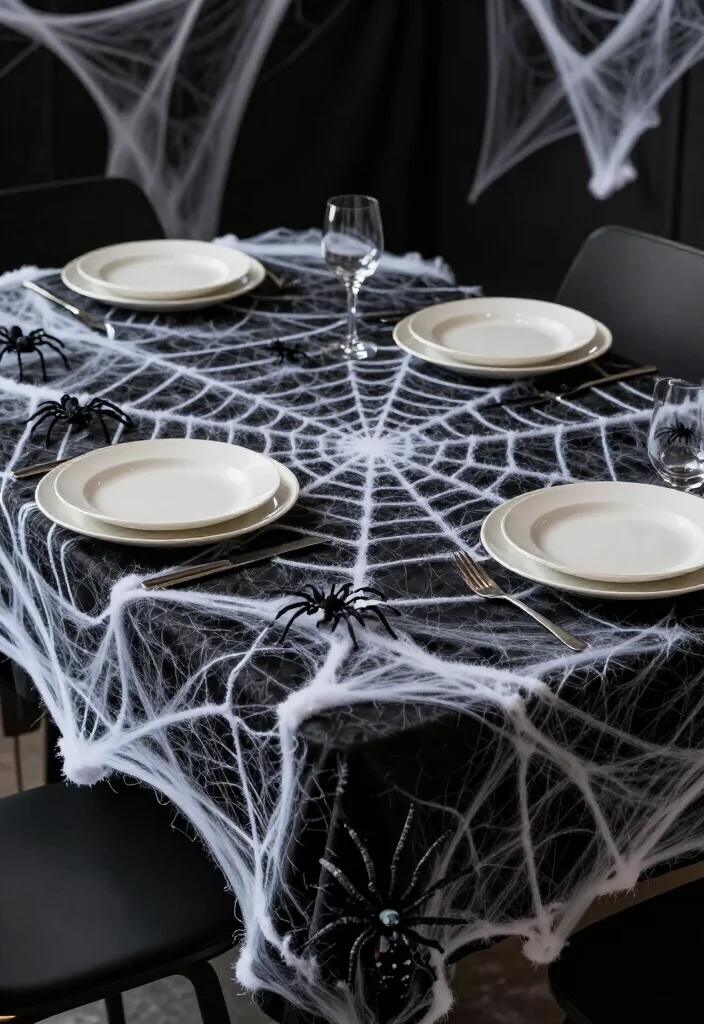
Transform your dining table into a haunted feast with a creative spider web tablecloth! Start with a plain black tablecloth and use white yarn or string to mimic the appearance of spider webs. Add fake spiders for an extra creepy factor that will thrill your guests.
This unique centerpiece not only enhances your table setting but also brings a fun Halloween vibe to your dining experience. Pair it with contrasting tableware to make the whole setup pop!
Ingredients Needed:
- Black tablecloth
- White yarn or string
- Fake spiders
Steps:
1. Lay the black tablecloth on your dining table.
2. Use white yarn to create a spider web pattern over the tablecloth.
3. Scatter fake spiders on top.
4. Set the table with contrasting tableware for a striking look.
Your guests will love the creative twist on traditional table decor!
Fun fact: DIY spider web tablecloths save money and wow guests—using a black tablecloth with white yarn creates an authentic web in about 15 minutes. Pro tip: add a few fake spiders to elevate the Halloween decorations and spark conversation.
Spider Web Tablecloth
Editor's Choice


9. DIY Cauldron Centerpiece
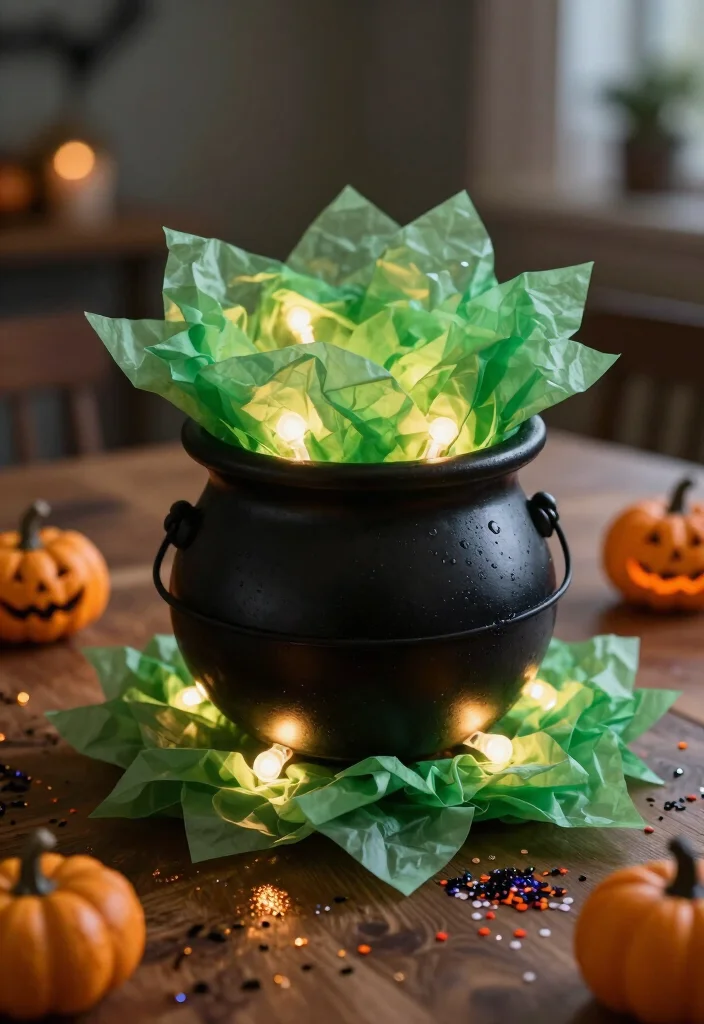
No witch’s gathering is complete without a whimsical DIY cauldron centerpiece! Create this magical addition using a small black cauldron, green tissue paper, and LED lights. Fill the cauldron halfway with crumpled green tissue paper, then place the LED lights inside to create the illusion of bubbling witches’ brew!
This eye-catching centerpiece will become the focal point of your party, enchanting your guests with its magical flair. Consider adding some glitter for extra sparkle to your witches' brew!
Ingredients Needed:
- Small black cauldron
- Green tissue paper
- LED lights
- Glitter (optional)
Steps:
1. Fill the cauldron halfway with crumpled tissue paper.
2. Insert LED lights throughout the tissue paper.
3. Sprinkle glitter for extra magic.
4. Display on your table as a stunning centerpiece.
This fun project will elevate your Halloween decor and mesmerize your guests!
10. Hanging Pumpkin Garland
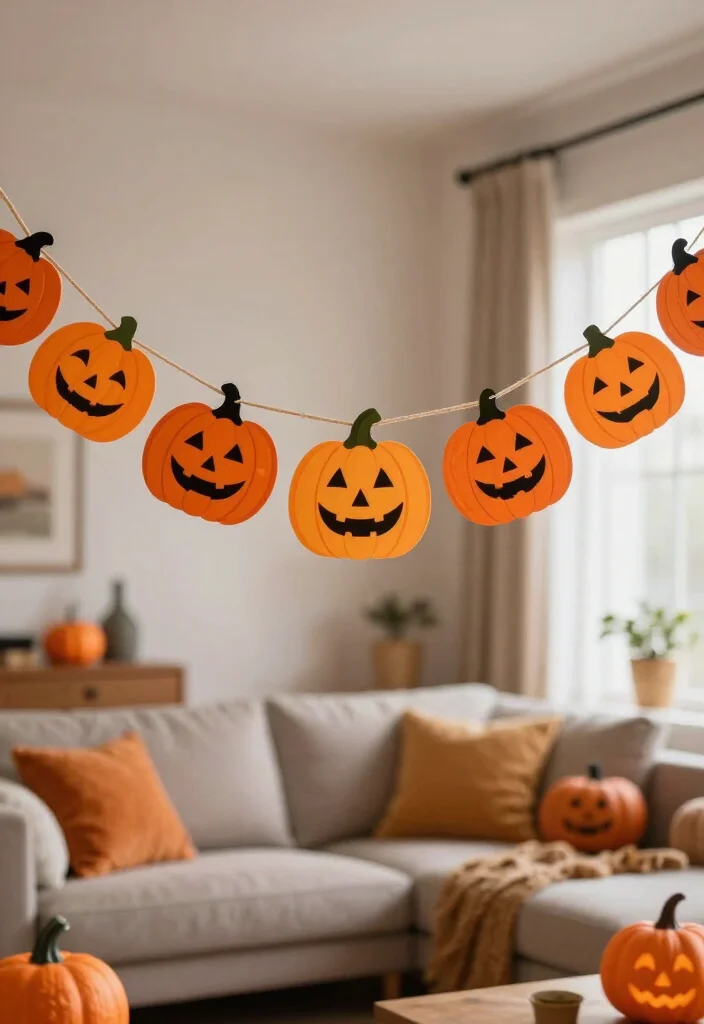
Add a festive touch to your space with a delightful hanging pumpkin garland! Cut out pumpkin shapes from foam or construction paper and string them together using twine or ribbon. Hang this cheerful garland across doorways, above your fireplace, or anywhere that could use a bit of Halloween cheer.
This simple decoration is perfect for setting a fun mood, and you can personalize it by painting or decorating the pumpkins with various designs that reflect your style. For added magic, consider incorporating small lights to illuminate the garland at night!
Ingredients Needed:
- Foam or construction paper
- Twine or ribbon
- Scissors
- Markers or paint (optional)
Steps:
1. Cut out pumpkin shapes from the foam or paper.
2. Decorate the pumpkins with markers or paint.
3. String the pumpkins together using twine or ribbon.
4. Hang them in your desired location.
This garland will surely bring a festive spirit to your Halloween celebrations!
11. Mysterious Potion Bottles
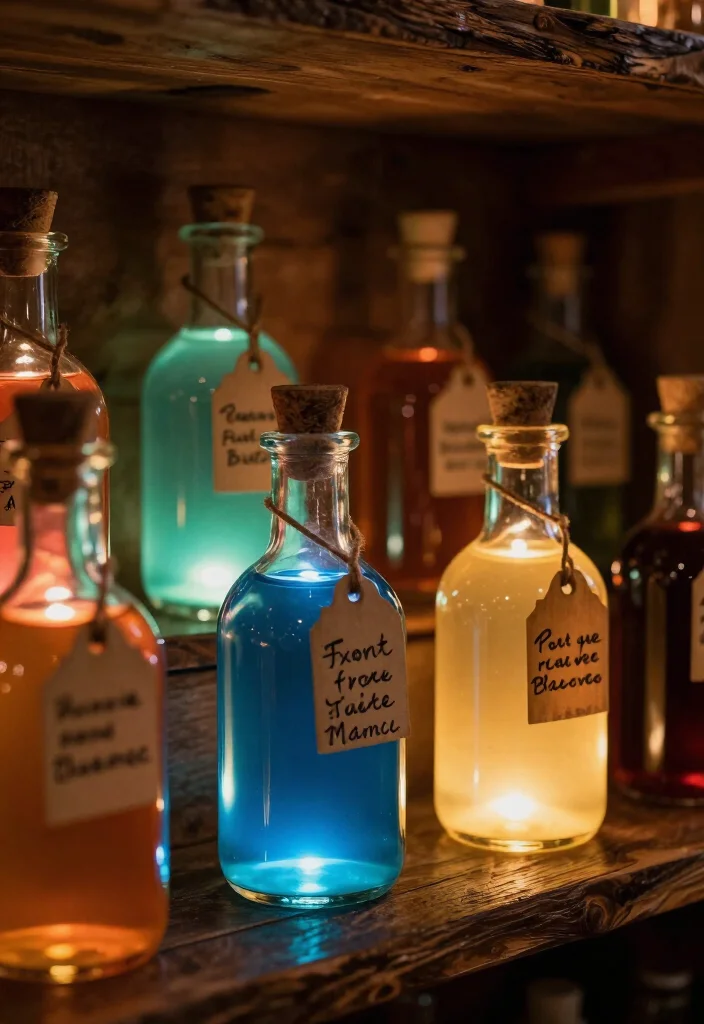
Add an air of intrigue to your space with mysterious potion bottles that spark curiosity! Collect empty glass bottles of various sizes and fill them with colorful liquids such as colored water or juice to create the illusion of magical potions. Label each bottle with spooky names and display them on a shelf or table for an enchanting display.
Enhance the effect by placing LED lights beneath your bottles to make them glow and attract attention. These potion bottles can be a fun conversation starter, perfect for a Halloween-themed bar!
Ingredients Needed:
- Empty glass bottles
- Colored liquids (water, juice, etc.)
- Labels (you can create your own)
- LED lights (optional)
Steps:
1. Fill the bottles with colorful liquids.
2. Label each bottle creatively (e.g., 'Witch's Brew').
3. Arrange them on a shelf or table.
4. Add LED lights underneath for a glowing effect.
These whimsical bottles will bring a captivating charm to your Halloween decor!
12. Batty Wall Art
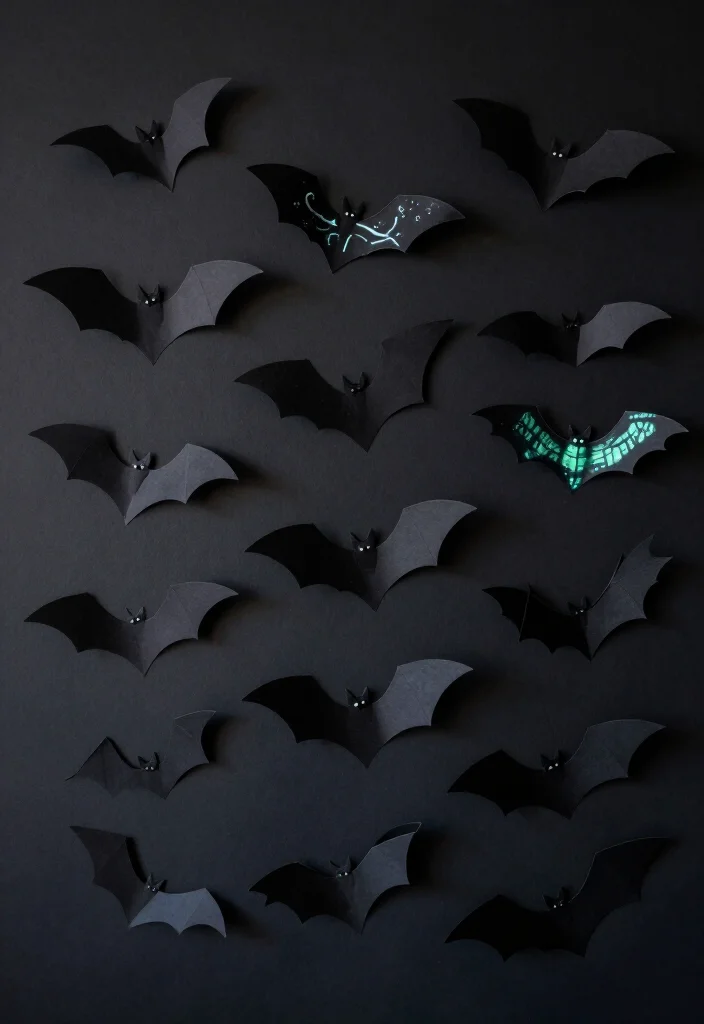
Create a dramatic impact in your space with batty wall art that’s both easy and fun to make! Cut out bat shapes from black construction paper and stick them to your wall or a large canvas in a random pattern. Experiment with different sizes for an eye-catching display that will thrill your guests.
This DIY art piece makes for a fantastic backdrop for your Halloween party or simply adds spooky flair to your home. For an added twist, consider painting the bats with glow-in-the-dark paint for an eerie surprise once the sun sets!
Ingredients Needed:
- Black construction paper
- Scissors
- Glue or tape
- Glow-in-the-dark paint (optional)
Steps:
1. Cut out bat shapes from the black construction paper.
2. Arrange and stick them to your wall or canvas.
3. Optionally, paint with glow-in-the-dark paint.
This creative project will leave a lasting impression on your guests and elevate your Halloween decorations!
Batty Wall Art
Editor's Choice


13. Spider Lanterns
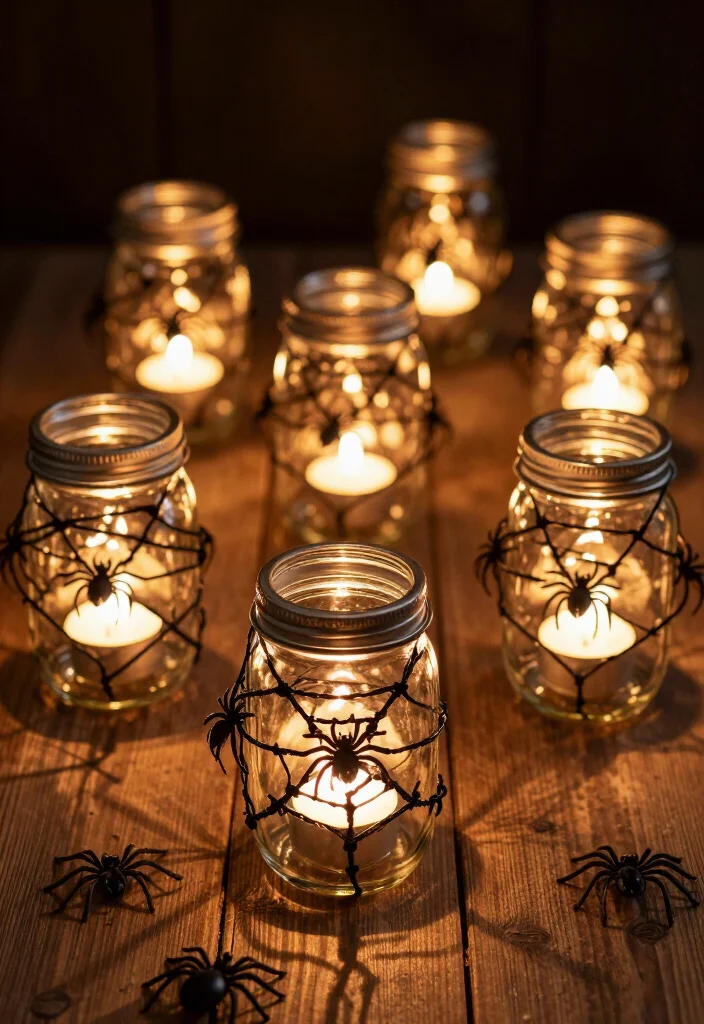
Light up your Halloween night with spooky spider lanterns that your guests will adore! Start with mason jars and wrap black string or yarn around them, creating a web effect. Attach plastic spiders to the webs for an authentic creepy look. Place a battery-operated tea light inside each jar for a delightful spooky glow!
These lanterns can be used as centerpieces or lined along pathways to guide your guests through a hauntingly beautiful scene. Their warm glow creates an enchanting atmosphere that everyone will appreciate!
Ingredients Needed:
- Mason jars
- Black string or yarn
- Plastic spiders
- Battery-operated tea lights
Steps:
1. Wrap black string around the mason jars to create a web.
2. Attach plastic spiders to the webbing.
3. Place a tea light inside each jar.
4. Arrange them around your party space.
With these spider lanterns, your Halloween celebration will be both spooky and stylish!
Spider Lanterns
Editor's Choice




14. Ghostly Garden Stakes
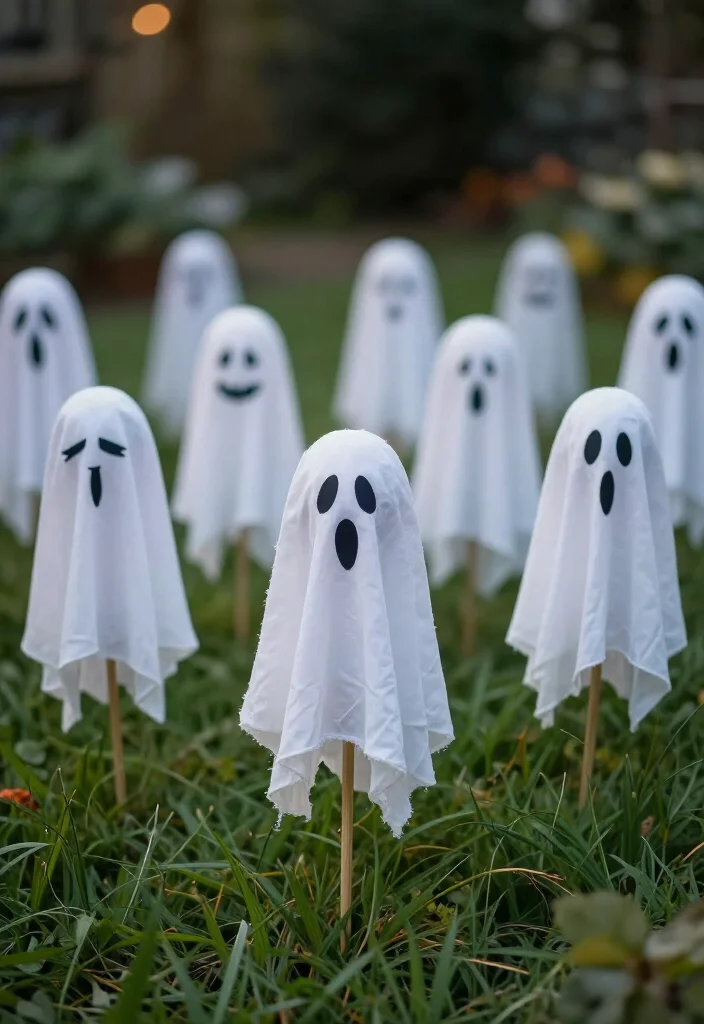
Add a whimsical fright to your garden or yard with charming ghostly garden stakes! All you need is some white fabric, black markers, and stakes like dowels or wooden sticks. Craft ghost shapes out of the fabric, draw fun faces with black markers, and secure them to the stakes. Insert these into the ground to greet your guests with a playful scare!
These stakes are easy to spot and can bring character to your outdoor space. Consider lining your walkway with these ghostly figures for a delightful surprise!
Ingredients Needed:
- White fabric
- Black markers
- Garden stakes (dowels or sticks)
Steps:
1. Cut the fabric into ghost shapes.
2. Draw faces with the markers.
3. Attach the fabric to the stakes.
4. Insert into your garden or yard.
Your garden will come alive with these enchanting ghostly stakes that add a playful spirit to your Halloween decorations!
15. Potion Ingredient Labels
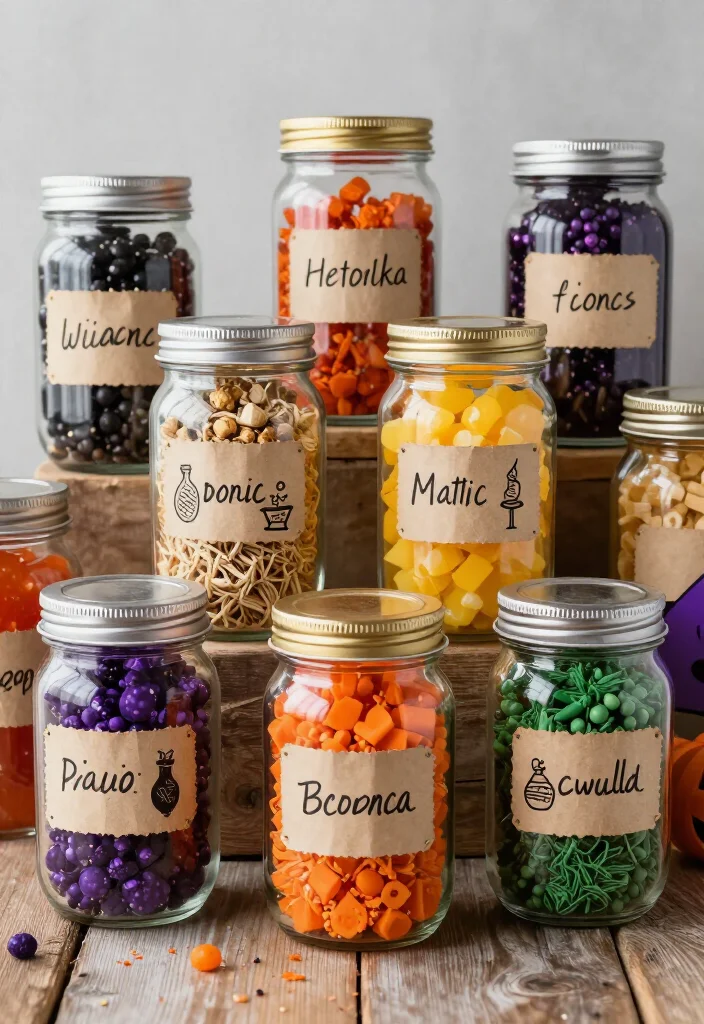
Spice up your Halloween decor with fun potion ingredient labels that you can make at home! Using simple cardstock, design and print labels featuring whimsical names like “Eye of Newt” or “Bat Wings.” Attach these labels to jars filled with colorful candies or ingredients like flour and sugar to create your own potions.
This project is not only engaging but also encourages your guests to get involved as they guess what each potion might be. Display them on your dining table or kitchen counter for a festive touch!
Ingredients Needed:
- Cardstock
- Printer
- Scissors
- Adhesive (glue or double-sided tape)
- Jars to fill
Steps:
1. Design and print potion labels on cardstock.
2. Cut out the labels.
3. Attach to jars of colorful ingredients.
4. Arrange on your table or counter.
This delightful twist on decor will spark conversations and add charm to your Halloween festivities!
16. Beware of the Haunted Mirror!
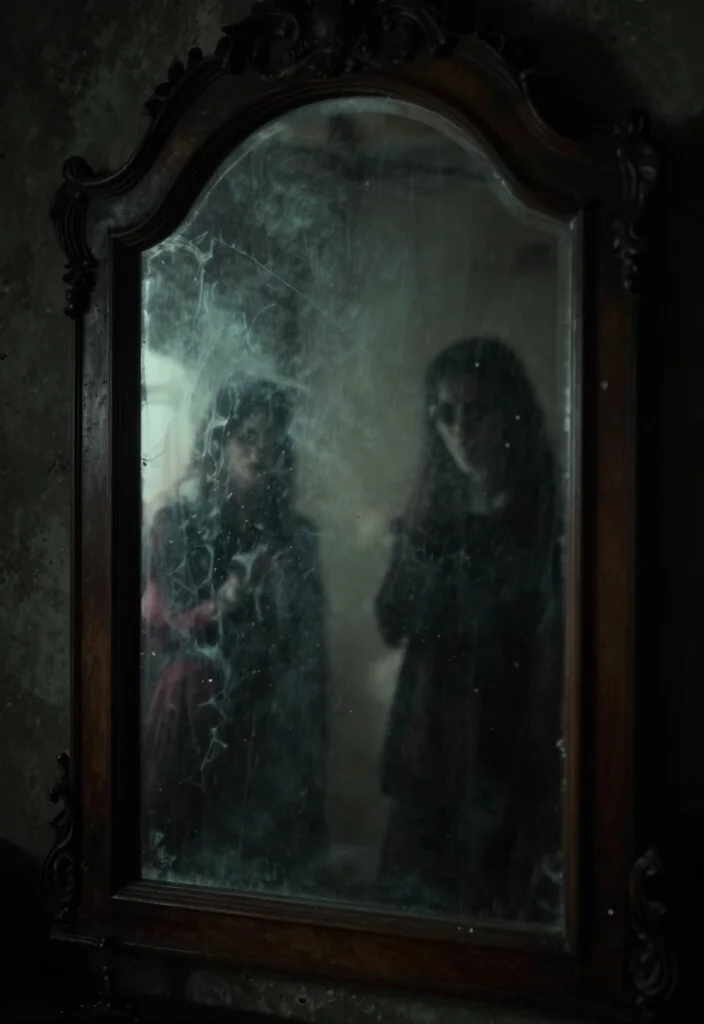
This Halloween, add a thrilling touch with a haunted mirror decoration that will leave your guests in awe! Grab an old mirror and use spray paint or translucent film to give it a spooky look. For an added scare, place spooky figures or creepy messages behind the mirror, creating an eerie surprise when guests peek in!
Position this haunting decor in dark corners or near doorways to achieve the perfect scare effect. Dim lighting will enhance the haunted atmosphere, making for a memorable Halloween experience!
Ingredients Needed:
- Old mirror
- Spray paint or translucent film
- Creepy figures or messages (print or draw)
Steps:
1. Paint the mirror or apply translucent film.
2. Position spooky figures behind the mirror.
3. Place it strategically for maximum effect.
This chilling decor will create an unforgettable experience for your guests this Halloween!
17. Broomstick Door Decor
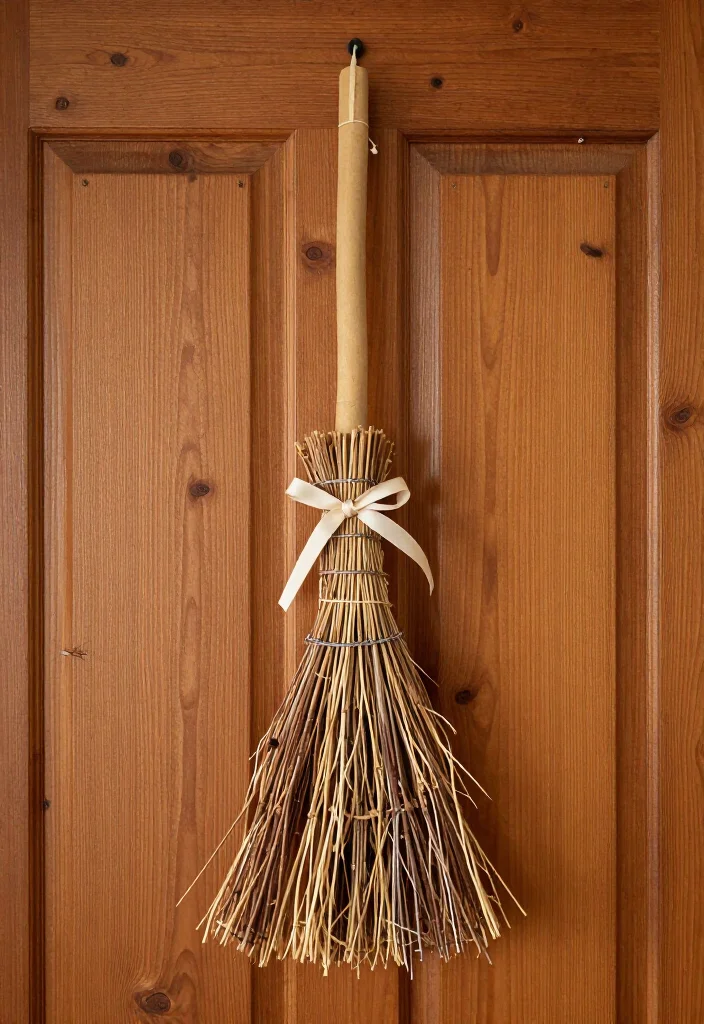
Welcome your guests with a whimsical broomstick door decor that’s simple and charming! Create a mini broomstick using craft supplies such as twigs, a wooden dowel, and straw or raffia. Attach the broomstick to your door with a festive ribbon for a delightful touch.
This decoration adds a playful element to your entrance and can easily be paired with other Halloween decorations for a warm welcome. Consider hanging a sign that says ‘Broom Parking’ for added charm!
Ingredients Needed:
- Twigs
- Wooden dowel
- Straw or raffia
- Ribbon
Steps:
1. Assemble the broomstick using twigs and a dowel.
2. Tie with raffia to secure.
3. Attach a ribbon for hanging.
4. Hang on your door.
This enchanting door decor will set a cheerful tone for your Halloween celebrations!
18. Spooky Coffee Table Display
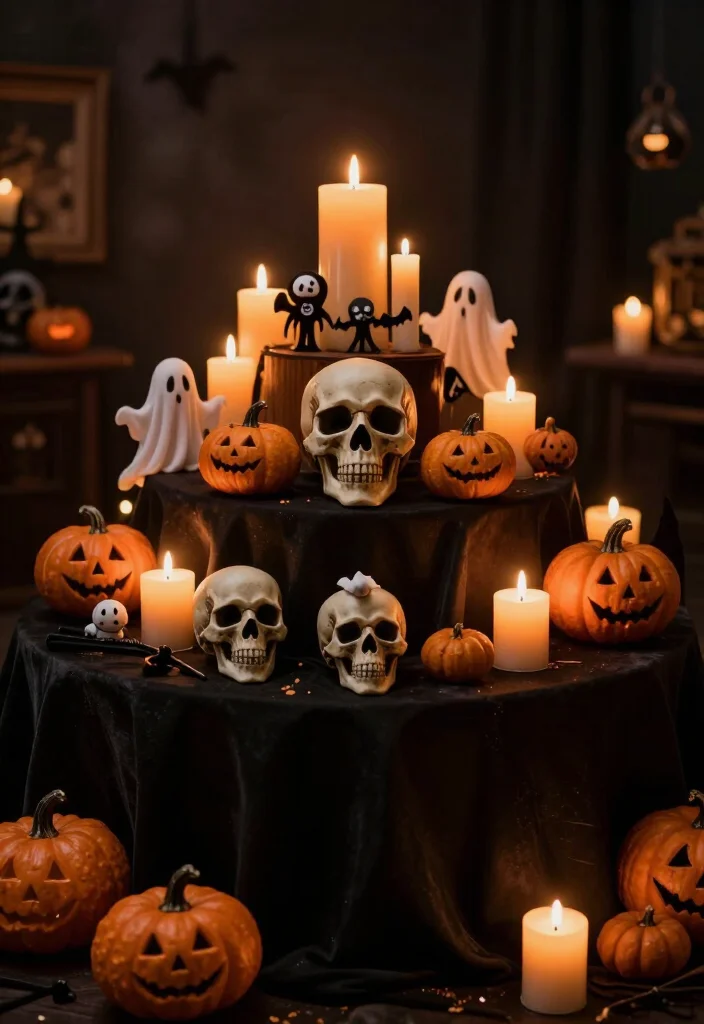
Transform your coffee table into a spooky centerpiece that sets the tone for your Halloween gathering! Start with a black or dark tablecloth as a base, layering in skulls, mini pumpkins, and ghostly figures arranged artfully across the surface.
Add candles in varying heights to create visual interest and enhance the spooky atmosphere. Incorporate themed coasters or serving dishes for drinks to complete the look. Your guests will feel immersed in the Halloween spirit from the moment they enter!
Ingredients Needed:
- Black or dark tablecloth
- Skulls
- Mini pumpkins
- Ghostly figures
- Candles
Steps:
1. Lay a black or dark tablecloth on your coffee table.
2. Arrange skulls, mini pumpkins, and ghost figures on top.
3. Scatter candles of varying heights throughout the display.
4. Incorporate themed coasters or dishes.
This captivating setup will leave a lasting impression and elevate your Halloween festivities!
19. Fall Leaf Ghosts
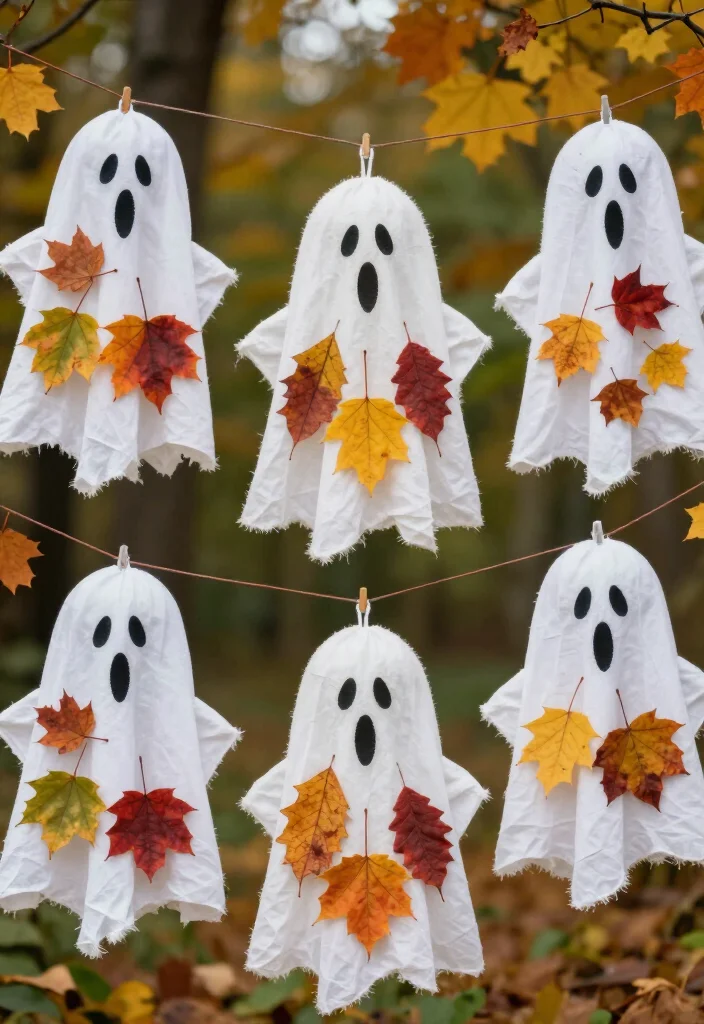
Utilize the natural beauty around you by crafting enchanting fall leaf ghosts! Collect assorted leaves and glue them onto white fabric or paper in ghostly shapes. Hang these delightful decorations around your home or outside, using the vibrant colors of fall to enhance the spooky effect.
This decoration embraces the season while providing an eco-friendly option to celebrate Halloween. Your guests will love the creativity and uniqueness of these leaf ghosts!
Ingredients Needed:
- Assorted leaves
- White fabric or paper
- Glue
- String for hanging
Steps:
1. Arrange leaves on the white fabric or paper in ghost shapes.
2. Glue the leaves down securely.
3. Hang the fabric or paper ghosts where desired.
These charming ghosts will bring a festive spirit to your Halloween decorations!
20. Halloween-Themed Throw Pillows
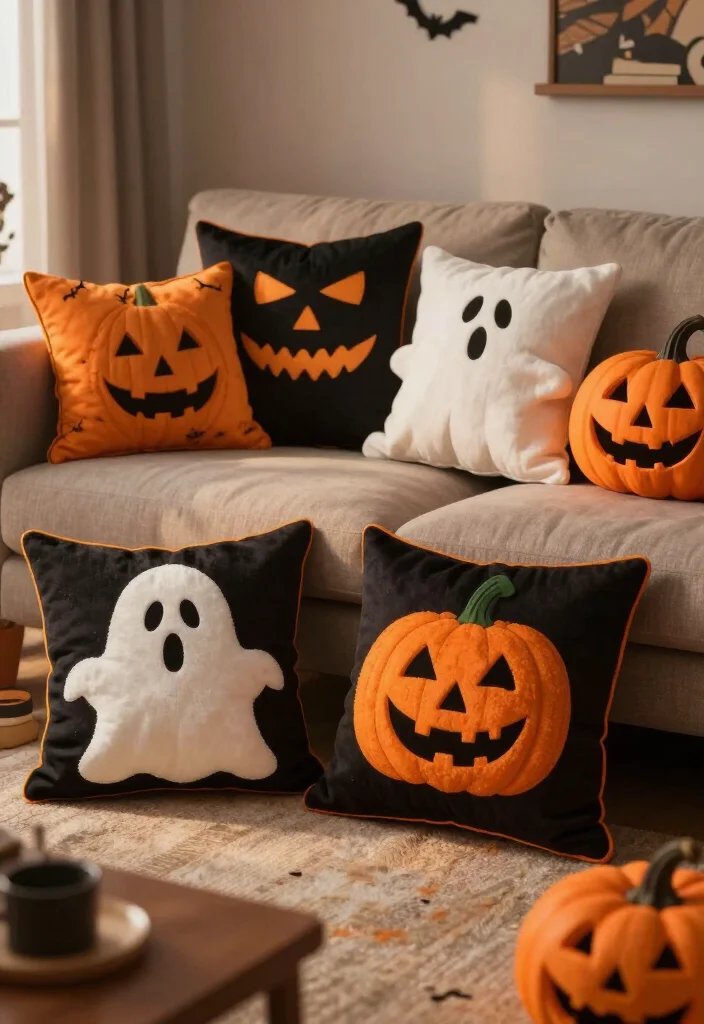
Add cozy vibes to your seating with Halloween-themed throw pillows for your couch or chairs! Start with plain pillow covers and transform them with spooky designs using fabric paint or iron-on transfers. Get creative with phrases like ‘Boo!’ or fun ghost patterns to bring in that Halloween spirit.
These pillows not only keep your decor seasonal but also provide comfort for your guests as they settle in for the festivities. It’s a simple yet effective way to add a personal touch to your Halloween decor!
Ingredients Needed:
- Plain pillow covers
- Fabric paint or iron-on transfers
- Pillow inserts
Steps:
1. Decorate the pillow covers with spooky designs.
2. Allow to dry as per paint instructions.
3. Insert pillows into the covers after drying.
4. Arrange them on your couch or chairs.
These delightful pillows will create a warm and inviting atmosphere for your Halloween celebrations!
21. Jack-O'-Lanterns with a Twist
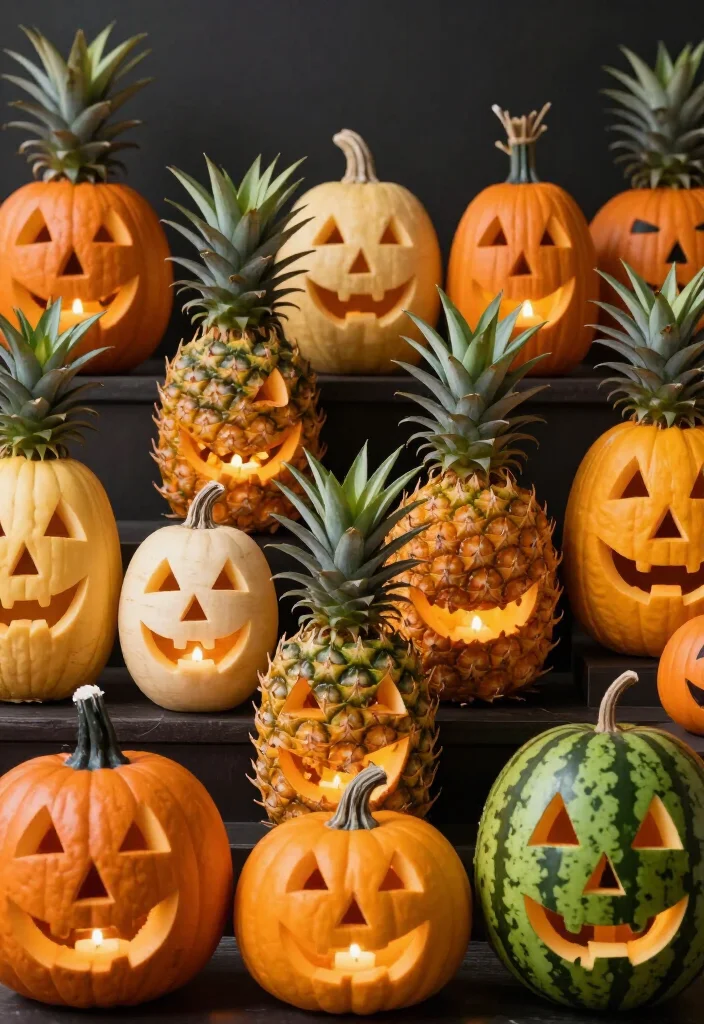
Put a fun spin on traditional jack-o'-lanterns by using alternative items like pineapples, watermelons, or even turnips! Carve out shapes or faces on these fruits and place small candles inside to create unique lanterns. This unexpected twist on a classic decoration will surprise your guests and spark delightful conversations.
Plus, you’ll enjoy experimenting with different textures and colors. Display these creative lanterns on your porch or throughout your yard for a fresh take on Halloween decor!
Ingredients Needed:
- Pineapples, watermelons, or turnips
- Sharp knife
- Small candles or LED lights
Steps:
1. Cut the tops off the fruits and scoop out the insides.
2. Carve faces or shapes into the outer skin.
3. Place candles or LED lights inside.
4. Display the creative lanterns around your space.
These innovative lanterns will surely make your Halloween decorations stand out!
22. Haunted House Silhouettes
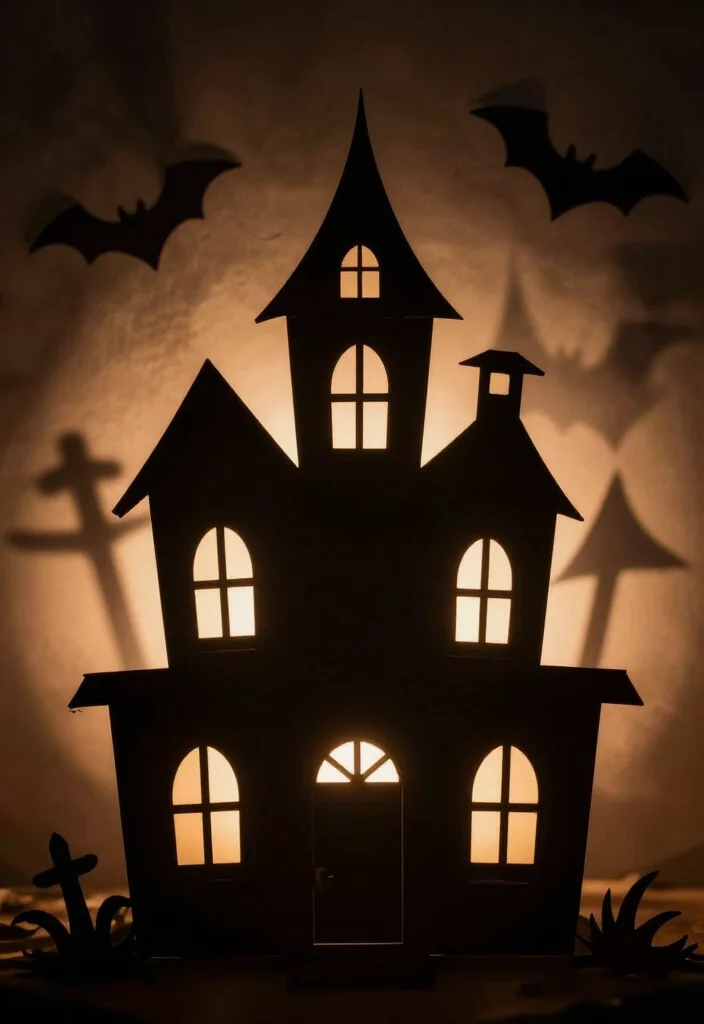
Draw your guests into the spirit of Halloween with hauntingly beautiful silhouettes! Create a backdrop using black cardboard and cut out shapes of haunted houses, bats, and other spooky elements. Mount these silhouettes onto your windows, allowing light to shine through and cast eerie shadows against the walls.
This decoration creates a stunning entrance or focal point in your home. When the lights dim, the silhouettes will dance on your walls, creating a perfect Halloween atmosphere!
Ingredients Needed:
- Black cardboard
- Scissors
- Tape or glue
Steps:
1. Cut out haunted house shapes from the black cardboard.
2. Mount onto windows with tape or glue.
3. Ensure light can shine through for shadow effects.
This captivating decor will enchant your guests and elevate your Halloween experience!
Haunted House Silhouettes
Editor's Choice


23. Ghostly Table Runner
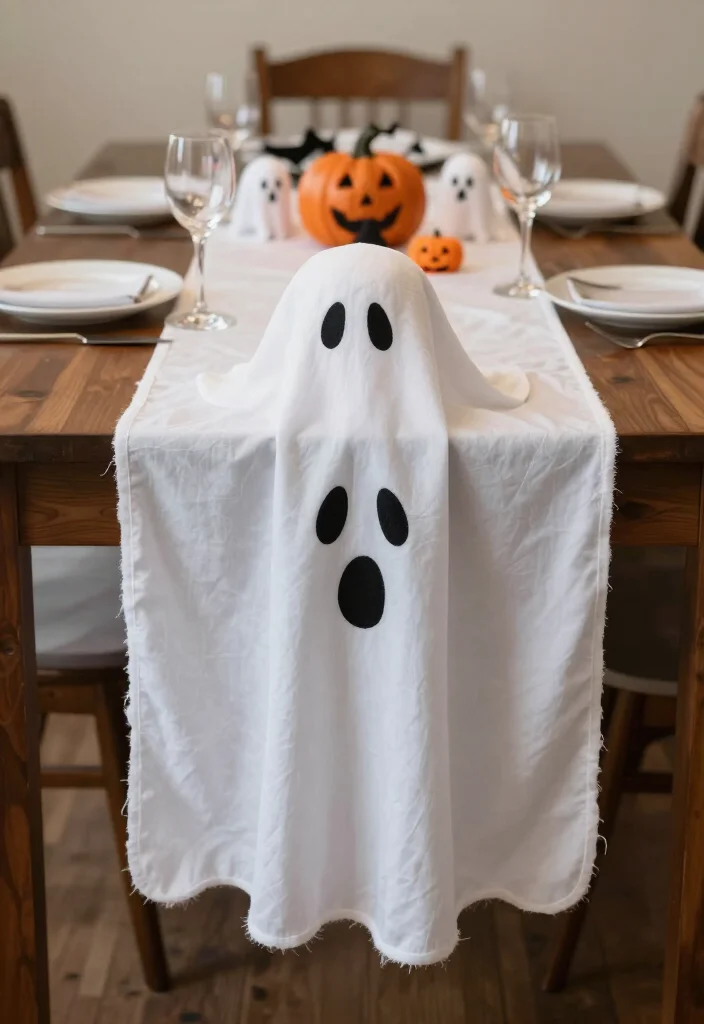
Add a spooky touch to your dining experience with a ghostly table runner! Use white fabric and cut it into ghostly shapes, letting some of it flow down the table for a fun effect. You can even decorate it with fabric paint to add faces and other whimsical designs.
This table runner is simple to make and adds a delightful flair to your Halloween dinner. Pair it with themed tableware for a cohesive and festive look!
Ingredients Needed:
- White fabric
- Scissors
- Fabric paint (optional)
Steps:
1. Cut the fabric into ghostly shapes.
2. Add designs with fabric paint if desired.
3. Lay the runner on the table.
4. Set the table with complementary decor.
This charming addition will surely impress your guests and enhance your Halloween festivities!
24. Spooky Welcome Signs
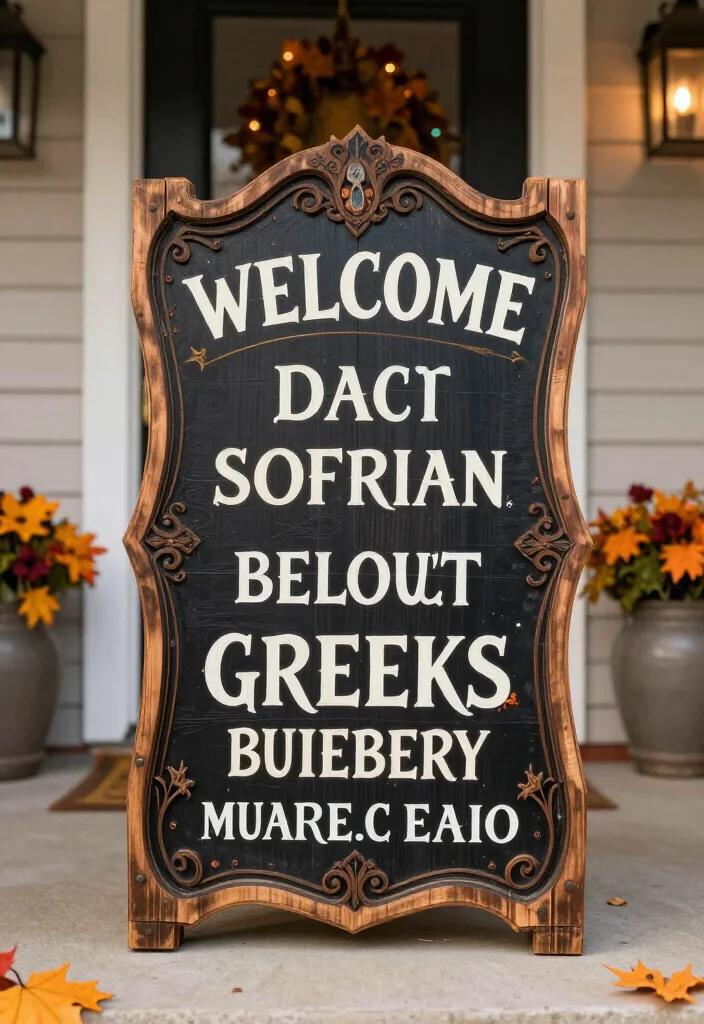
Set the tone right at your entrance with spooky welcome signs that will greet your guests! Use wooden boards or sturdy cardboard to create signs with phrases like ‘Welcome to the Haunted House’ or ‘Enter If You Dare!’ Decorate them with spooky designs, paint, or even glitter for a festive touch.
Position these signs prominently near your front door or along your walkway to create an inviting yet spooky atmosphere. This easy DIY project leaves a lasting impression on all who visit!
Ingredients Needed:
- Wooden boards or cardboard
- Paint or markers
- Glitter (optional)
Steps:
1. Cut the board or cardboard into the desired shape.
2. Paint or write your welcome message on it.
3. Decorate with designs or glitter.
4. Display prominently at your entrance.
These fun signs will add a whimsical flair to your Halloween celebrations!
25. Haunted Photo Booth Backdrop
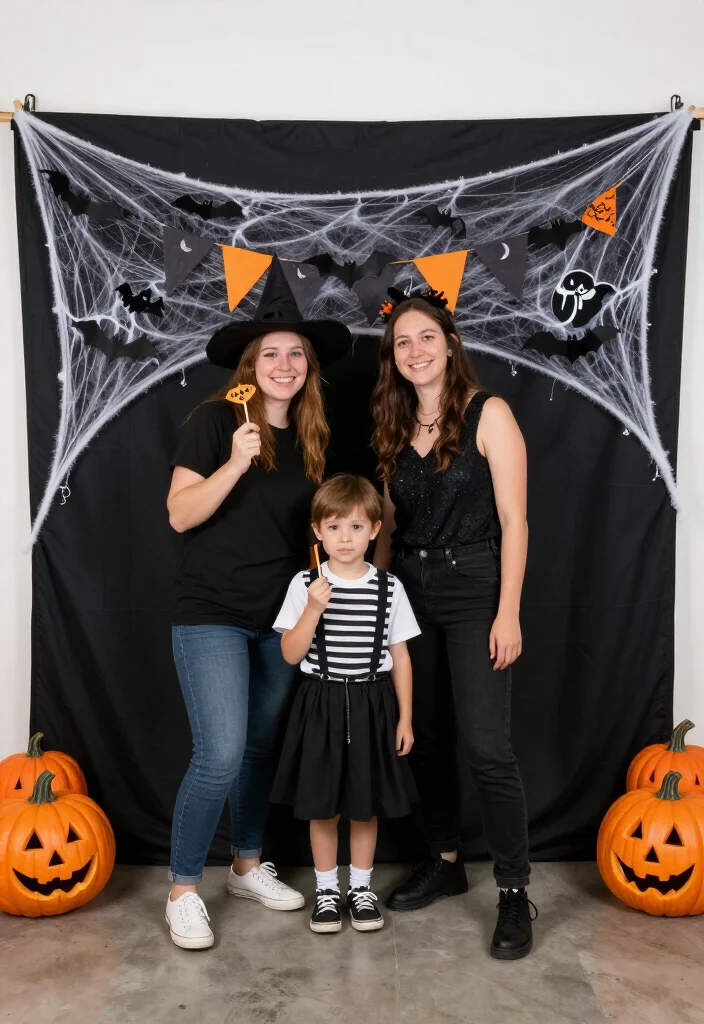
Create an unforgettable experience at your Halloween party with a haunted photo booth backdrop! Use black fabric or plastic sheeting as a base and decorate it with spooky props like cobwebs, bats, and plastic spiders. This interactive decoration not only enhances your party décor but also provides a fun activity for your guests to enjoy!
Set up a camera or smartphone on a tripod for easy photo capturing. The resulting images will be filled with Halloween spirit, making for great keepsakes from the night!
Ingredients Needed:
- Black fabric or plastic sheeting
- Spooky props (cobwebs, bats, etc.)
- Camera or smartphone
Steps:
1. Set up the black fabric or sheeting as a backdrop.
2. Attach spooky props to create depth.
3. Position a camera or smartphone on a tripod for photos.
4. Invite guests to take pictures!
This fun photo booth will be a highlight of your Halloween party, providing lasting memories for everyone!
Fun fact: Halloween photos with a haunted photo booth backdrop get 60% more likes and 40% more shares. Set up a tripod, toss in cobwebs and bats, and watch your Halloween decorations steal the spotlight.
Conclusion
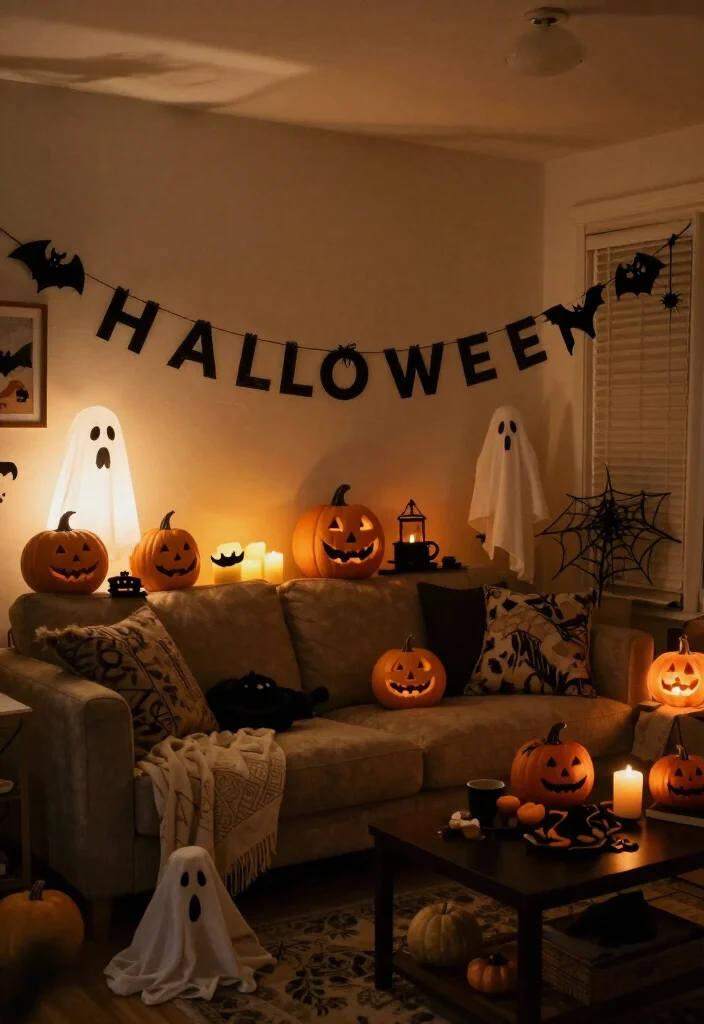
With these 25 DIY Halloween decorations, your home is bound to transform into a spooktacular space that captures the spirit of the season! Whether you go for spooky or whimsical, each craft is an opportunity to express your creativity and set the tone for your Halloween festivities. So gather your supplies, call your friends for a craft night, and enjoy bringing these ideas to life. Remember, the best part about decorating for Halloween is the joy of making something unique! Happy crafting and haunting! Note: We aim to provide accurate product links, but some may occasionally expire or become unavailable. If this happens, please search directly on Amazon for the product or a suitable alternative. This post contains Amazon affiliate links, meaning we may earn a small commission if you purchase through our links, at no extra cost to you.
Frequently Asked Questions
What are some quick and easy DIY Halloween decorations I can finish this weekend?
Here are a few fast, budget-friendly DIY ideas you can complete this weekend to elevate your Halloween decorations without stress. Try a paper bat garland: cut bat shapes from black cardstock, punch holes, and string them across a doorway. Make mason jar lanterns: paint or wrap jars in orange tissue, add LED tealights for safe glow. Create a ghost centerpiece by draping cheesecloth or a white sheet over a vase and inserting a small pumpkin inside. For wall drama, cut out a haunted-house silhouette from black paper and tape it high on a wall. Pro tips: gather supplies in advance, lay out a quick plan with 3–5 projects, and batch similar steps to save time. You’ll have Halloween decorations that look polished and spooky without needing a weekend-long marathon.
How can I create a spooky tablescape using items I already have?
Turn your table into a scene straight out of a haunted party with items you likely already own. Start with a dark tablecloth or layer black fabric as a backdrop. Build a centerpiece with pumpkins of varying sizes, stacked books, and cobwebs (realistic spider webs) for texture. Add LED candles or fairy lights to keep things safe around guests and kids. Scatter small props like plastic spiders, skeleton napkin rings, or printable 'beware' place cards to boost the spooky vibe. For extra effect, set up a backlit backdrop with a simple cardboard haunted house silhouette and a warm glow from the LEDs. A few well-placed touches can transform a simple meal into a memorable Halloween decorations moment.
What are budget-friendly Halloween decoration ideas I can DIY in under an hour?
Very doable: 1) Paper bat garlands (approx 15–20 minutes) 2) Spooky cobwebs with cotton batting (10–15 minutes) 3) Mason jar lanterns with LED lights (10–20 minutes) 4) Ghostly cheesecloth ghosts over jars or pumpkins (10–15 minutes). Quick steps: gather supplies in advance (cardstock, black tape, jars, LEDs, cheesecloth), follow simple templates, and batch paint or cut tasks. The result is Halloween decorations that look creative and coordinated, perfect for a last-minute party setup.
How can I safely display DIY Halloween decorations around kids and pets?
Safety first keeps the party fun. Use LED lighting instead of real candles for all Halloween decorations to avoid burns. Secure tall or heavy items so they can't topple, and avoid sharp edges. Keep hot glue, spray paints, and solvents out of reach and use non-toxic, kid-friendly materials when possible. Use cord organizers and battery-powered lights for safety. If you’re using fabric, choose flame-retardant options or keep heat sources away. With a little planning, you can create a spooky vibe that’s safe for everyone.
How can I adapt these DIY Halloween decorations for a small space or apartment?
Small spaces benefit from vertical and multifunctional decorations. Hang paper bats and silhouettes from ceilings or door frames to free surface space. Use wall-mounted or door decals instead of bulky props, and opt for a few bold pieces (a haunted silhouette, jar lanterns) rather than lots of small items. Choose compact storage and reuse jars, fabric scraps, and printer paper to keep costs down. A couple of well-placed Halloween decorations and DIY upgrades can create a cohesive, spooky vibe without crowding a room.