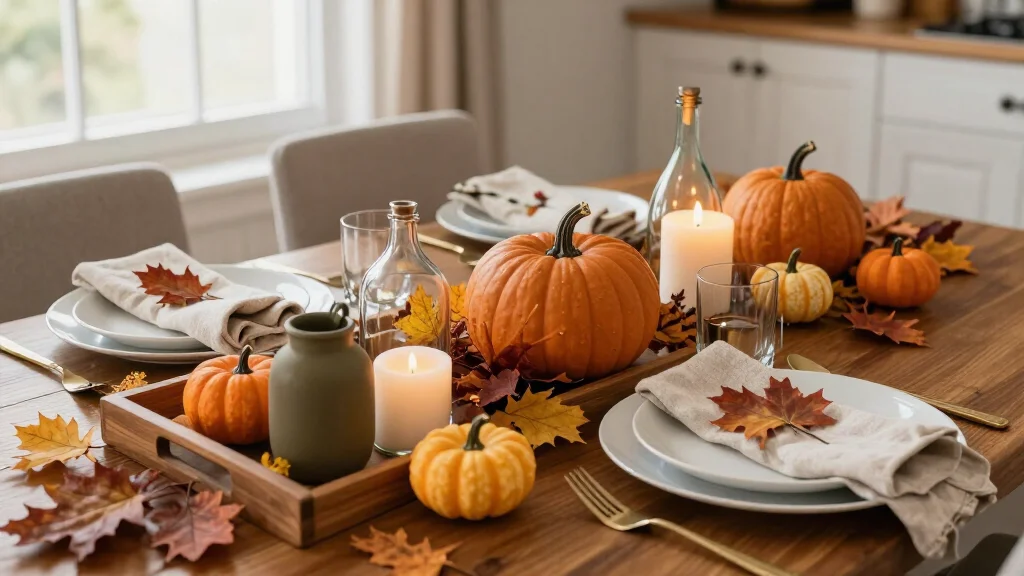

Thanksgiving decorating can get expensive fast. A few pumpkins, candles, table linens, and fall accents can take a big bite out of your holiday budget. You should not have to choose between a welcoming home and a full wallet. With a few smart swaps, low-cost finds can look polished, warm, and ready for guests.
I put this guide together for anyone who wants beautiful budget Thanksgiving decor without spending all month shopping. It is made for renters, busy hosts, DIY beginners, and anyone who loves a cozy fall home but does not want clutter or costly seasonal pieces. You will find ideas for the dining table, mantel, entryway, walls, and small corners that need a little seasonal charm.
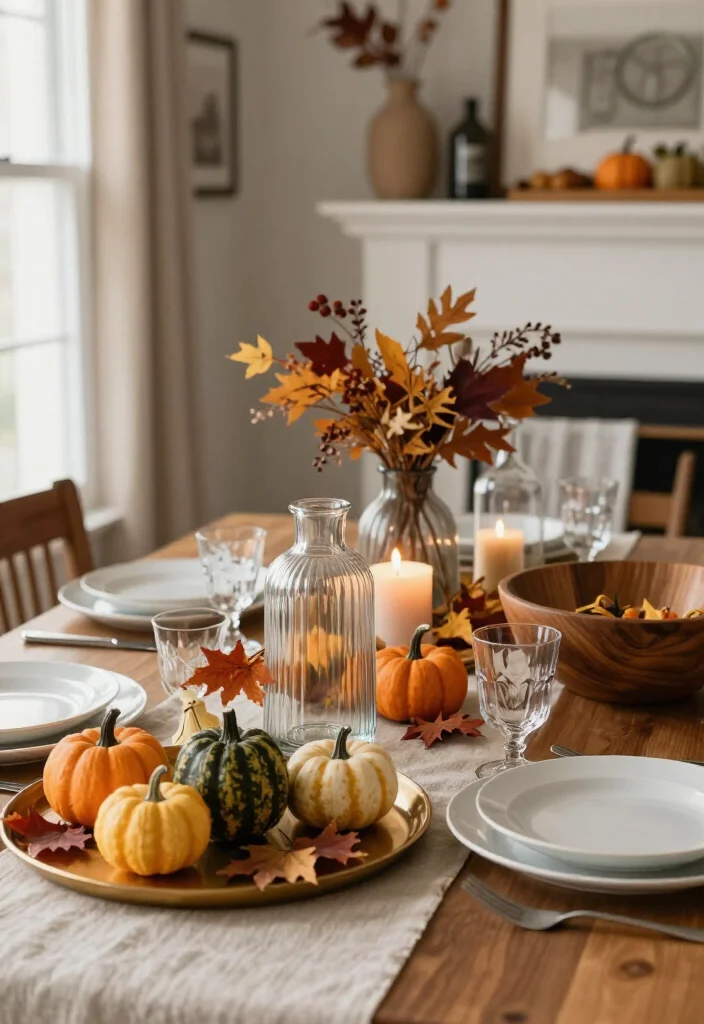
These 18 ideas use easy-to-find items such as thrifted glassware, kraft paper, velvet ribbon, mason jars, wooden trays, dried leaves, gourds, and dollar store supplies. You will learn how to group small pieces so they look like a planned display, mix low-cost items with one or two thrifted accents, and choose colors that make simple decor feel more polished. Soft cream, muted orange, bronze, amber, and deep green work well together without making your home feel too busy. You will also see how to make DIY fall decor that takes little time, including a no-sew table runner, a dried-leaf garland, painted gourds, and a botanical collage. The gold tray arrangement at #7 shows how dollar store Thanksgiving decor can look far more expensive than it costs.
Before you begin, shop your home first. A wooden bowl, old vase, serving tray, basket, or set of mismatched candleholders may already give you the shape you need. Use odd numbers when grouping items, vary the height of candles and pumpkins, and leave open space around each display. That small bit of breathing room helps a table or mantel look neat instead of crowded. If you use real candles, keep flames away from leaves, ribbon, paper, and other dry materials. Battery candles work well in jars and small spaces, too. Now let’s break down the ideas that make affordable holiday decorating feel warm, personal, and pulled together.
Key Takeaways
- Build displays in layers. Start with a tray, bowl, runner, or basket, then add items with different heights and textures. This makes thrifted and dollar store pieces look like one planned arrangement.- Keep the color plan simple. Pair cream, amber, soft orange, bronze, and green for a calm fall look. Repeat two or three shades across the table, mantel, and entryway.
- Use everyday materials in fresh ways. Kraft paper can become placemats, mason jars can become amber votives, and drop cloth can become a table runner with no sewing needed.
- Add small personal details. Mini pumpkins as place cards, velvet-wrapped napkins, and a framed leaf collage help guests feel welcome without a large shopping list.
- Mix shopping with making. Pair one thrifted piece, such as a glass pumpkin or brass candlestick, with homemade leaves, painted gourds, or a wooden bowl filled with produce. This keeps the total cost low while giving the room a collected look.
Contents
- 1. Build a Thrifted Glass Pumpkin Centerpiece
- 2. Layer a Candle Cluster on a Wooden Tray
- 3. Make a Simple Dried-Leaf Garland
- 4. Turn Kraft Paper into Elegant Placemats
- 5. Use Mini Pumpkins as Place Cards
- 6. Wrap Napkins with Velvet Ribbon
- 7. Create a Dollar-Store Gold Tray Arrangement
- 8. Mix Thrifted Brass Candlesticks
- 9. Give the Mantel a Neutral Pumpkin Makeover
- 10. Turn Mason Jars into Amber Votives
- 11. Hang a Corn Husk Wreath
- 12. Paint Gourds in a Soft Harvest Palette
- 13. Stack Pumpkins in the Entryway
- 14. Make a No-Sew Table Runner from Drop Cloth
- 15. Float Cranberries in a Glass Vase
- 16. Frame a Botanical Fall Collage
- 17. Style a Basket Wall with Fall Foliage
- 18. Fill a Wooden Bowl with a Loose Harvest Mix
1. Build a Thrifted Glass Pumpkin Centerpiece
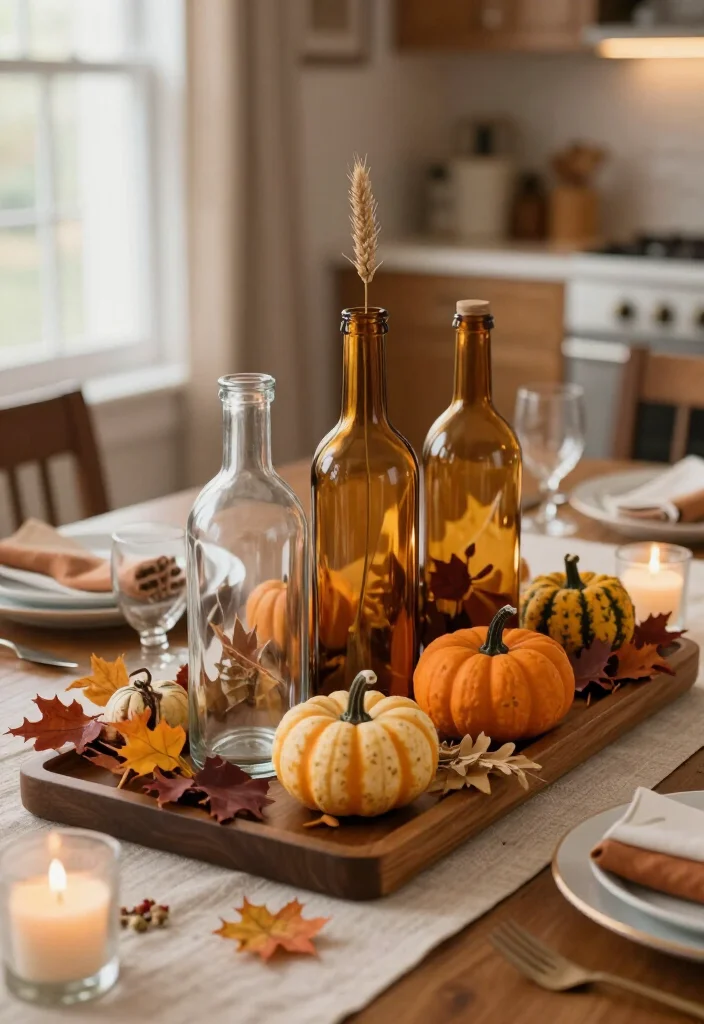
You do not need a matching centerpiece to make your Thanksgiving table feel thoughtfully styled. A few thrifted glass vessels, warm pumpkins, and dried foliage create layers of height, color, and texture for very little money. The mismatched pieces make the display feel collected rather than mass-produced.
Materials:
- 3 to 5 thrifted glass vases, jars, or bottles
- 2 or 3 small pumpkins or gourds
- Dried eucalyptus, wheat, leaves, or faux stems
- A wooden tray or shallow basket
- Neutral linen runner
- Battery candles or unscented votives
- Floral snips
Steps:
1. Wash and dry every glass piece. Remove sticky labels with cooking oil.
2. Set the tallest bottle at the back of the tray, then layer shorter vessels in front.
3. Add pumpkins in uneven groupings. Odd numbers usually look more relaxed.
4. Trim foliage to several heights, keeping the center low enough for conversation.
5. Finish with one candle in a glass holder, using a battery light near dry leaves.
Repeat one shade, such as amber, tan, or brown, to connect the different pieces.
FAQs:
- Can I use real foliage? Yes, but keep it dry and away from flames.
- Where can I find inexpensive glass? Check thrift shops after wedding season.
- How long will it last? Dried stems last for years, while whole pumpkins can last several weeks.
❝ For budget Thanksgiving decor, mix 3–5 thrifted glass pieces with pumpkins and dried stems to create height and texture without a matching set. Layer varied shapes and warm tones, and your table will look collected, cozy, and far more expensive than it really is.
Build a Thrifted Glass Pumpkin Centerpiece
Editor's Choice




Cost Breakdown & Budget Planning
You can create polished budget Thanksgiving decor without filling your cart with new items. A six-person table usually costs $35 to $90 when you mix thrifted pieces, dollar-store Thanksgiving decor, and items already in your home. If you also style the mantel and entryway, set aside $90 to $160. Start with a spending cap, then divide it into 60% for the table, 25% for the mantel or entry, and 15% for small extras. 💡Cost Breakdown by Category
Prices below use U.S. dollars, with rough pound and euro ranges for easy planning.
1. Materials/Products: $20 to $140, about £16 to £110 or €18 to €130. This covers pumpkins, candles, ribbon, kraft paper, dried leaves, jars, trays, paint, flowers, and table linens. A thrifted centerpiece may cost $8, while a full table with brass candlesticks and linen napkins may reach $120.
2. Tools/Equipment: $0 to $35, about £0 to £28 or €0 to €32. You may need scissors, a glue gun, floral snips, paintbrushes, tape, or a small wire cutter. Borrow these tools or check your kitchen drawers before buying anything.
3. Labor/Professional installation: $0 for DIY or $75 to $200, about £60 to £160 or €70 to €185. Most readers can finish these projects alone in two to four hours. A stylist may help with a large dining room, photo shoot, or last-minute party setup.
4. Optional extras: $10 to $60, about £8 to £48 or €9 to €55. Add fresh flowers, battery candles, velvet ribbon, printed menus, linen napkins, or extra pumpkins when your budget allows.
Basic Economy Tier £/€/$
What's included: Spend $25 to $45, or about £20 to £36 or €23 to €41. Use kraft paper placemats, grocery-store pumpkins, thrifted jars, one candle pack, and free leaves or branches. This creates a warm table for four to six guests.
Good for: A first-time host, a small meal, or a quick DIY fall decor project.
Limitations: You will have fewer layers, less matching color, and little room for fresh flowers or premium linens.
Mid-Range Tier ££/€€/$$
What's included: Spend $60 to $110, or about £48 to £88 or €55 to €101. Add a candle cluster on a wooden tray, mini pumpkin place cards, amber votives, a simple leaf garland, velvet ribbon, and one thrifted brass piece.
Good for: A six- to eight-person dinner where you want the table and one nearby area to feel connected.
Best value for most people: This tier gives you color, height, texture, and a finished look without paying for a full set of matching decor.
Premium Tier £££/€€€/$$$
What's included: Spend $140 to $260, or about £112 to £208 or €129 to €239. Choose linen napkins, a quality table runner, glass pumpkins, brass candlesticks, fresh foliage, dripless candles, and extra pieces for the mantel and entryway.
Good for: Hosts with 10 or more guests, holiday photos, or anyone who plans to reuse the pieces for years.
Worth it if: You host every fall and want items that store well, wash easily, and work with Christmas or winter decor.
Money-Saving Tips
1. Shop your home first. Wooden bowls, baskets, jars, trays, and wine glasses can all support a harvest display.
2. Pick one palette, such as cream, rust, and muted green. Fewer colors help low-cost pieces look planned.
3. Buy candlesticks, trays, and vases at thrift stores. A mixed collection often looks richer than a matching set.
4. Gather fallen leaves, small branches, and pinecones from your yard. Let them dry fully before placing them near candles. ✔
Where to Splurge
Spend more on candles that burn evenly and sit in sturdy holders. A quality runner or washable napkins also earn their price because you can use them each year. If you choose one standout piece, make it the centerpiece anchor, such as a glass pumpkin, brass tray, or large wooden bowl. ⏱
2. Layer a Candle Cluster on a Wooden Tray
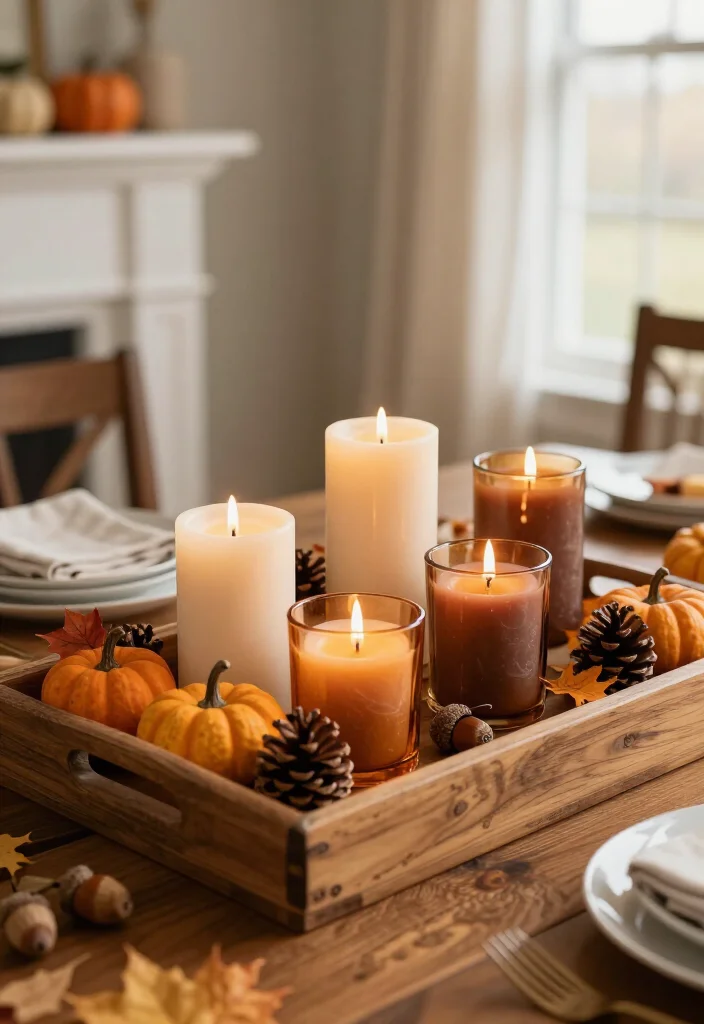
A small candle grouping can make a plain sideboard or dining table glow with warmth. Instead of buying decorative holders one at a time, place affordable candles on one wooden tray so they read as a complete arrangement. Different heights add interest, while soft cream, amber, and brown tones keep the display calm.
Materials:
- One wooden tray, cutting board, or serving board
- 3 to 7 candles in cream, amber, or brown
- Small glass jars or candleholders
- Mini pumpkins, acorns, or pinecones
- Dried leaves or cinnamon sticks
- Felt pads or shelf liner
Steps:
1. Wipe the tray clean and place felt under each holder to prevent sliding.
2. Set the tallest candle toward the back and shorter candles near the front.
3. Arrange the holders in a loose triangle instead of a straight row.
4. Add two mini pumpkins or a few pinecones, leaving open space around the flames.
5. Place the tray where it will not be bumped by serving dishes or sleeves.
Plain candles look polished when their holders share one finish. Clear glass feels light, while bronze or black gives the arrangement more contrast. Use flameless candles around pets, children, fabric, or dry foliage.
FAQs:
- Can I use a cutting board? Yes, choose one that is clean and no longer used for food.
- How many candles should I use? Three suits a small surface, while five or seven fills a longer tray.
- Can scented candles sit near dinner? Light scents are best because strong fragrance can compete with food.
Layer a Candle Cluster on a Wooden Tray
Editor's Choice


3. Make a Simple Dried-Leaf Garland
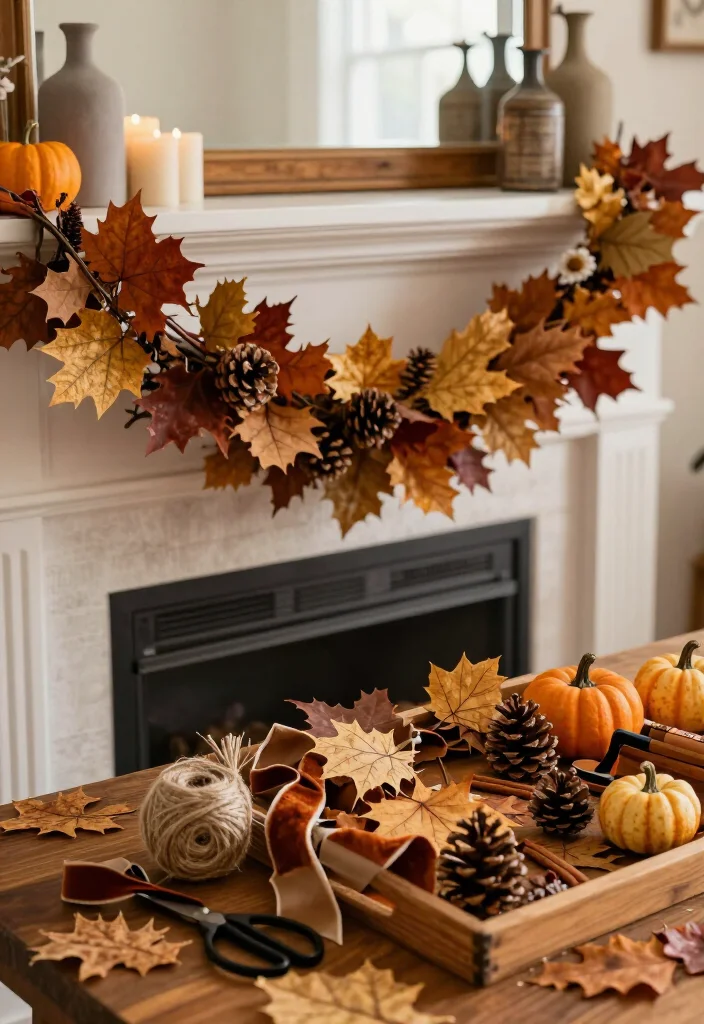
A handmade leaf garland brings fall color to a mantel, table, shelf, or mirror without taking over the room. Slight differences in shape and spacing give it an easy, natural look. You can use real leaves, faux stems, or kraft-paper cutouts, depending on what you already have.
Materials:
- Dried or faux autumn leaves
- Jute twine, cotton cord, or ribbon
- Large needle or hole punch
- Small pinecones and cinnamon sticks
- Scissors
- Optional kraft paper leaves and velvet ribbon
Steps:
1. Sort leaves into rusty orange, tan, muted yellow, and faded green groups.
2. Punch a small hole near each stem. Reinforce fragile leaves with clear tape first.
3. Thread the leaves onto twine, leaving about one inch between pieces.
4. Add a pinecone or cinnamon stick every twelve inches for texture.
5. Tie loops at both ends and drape the garland loosely over the chosen surface.
Keep the tallest pieces low on a table so guests can see across it. Short velvet ribbons in cinnamon, olive, or cream can make the garland feel more finished. Press fresh leaves under books for several days before threading them.
FAQs:
- Can I reuse faux leaves? Yes, store them flat between tissue sheets.
- Can the garland sit near candles? Only with several inches of space from every flame.
- Is twine too casual? Pair it with velvet ribbon or a brass clip for a softer, refined look.
4. Turn Kraft Paper into Elegant Placemats
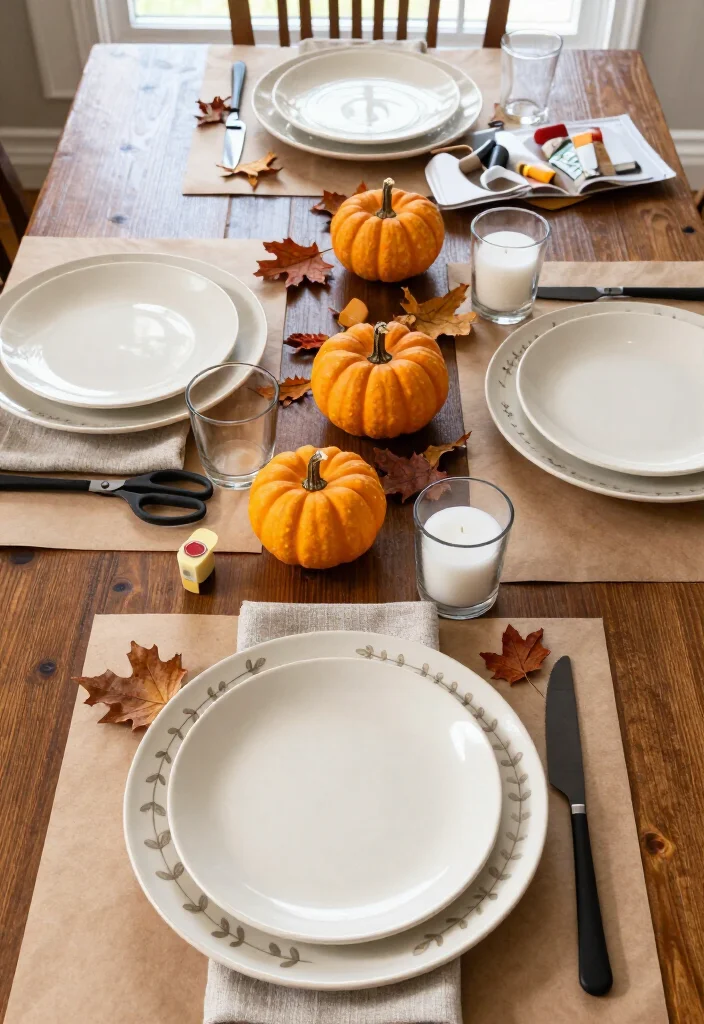
Kraft paper gives your Thanksgiving table a warm, layered base without the cost of seasonal linens. Its soft brown color looks striking beneath white plates, clear glasses, and cream napkins. A narrow painted border or one simple leaf stamp adds personality while keeping the setting clean and modern.
Materials:
- Kraft paper or opened paper grocery bags
- Scissors or paper cutter
- Cream or white acrylic paint
- Small leaf stamp or sponge
- Neutral plates and napkins
- Optional clear craft sealer
Steps:
1. Cut each mat about 12 by 16 inches, or make it two inches wider than the plate on every side.
2. Flatten curled paper under books for a few hours.
3. Paint a thin border or stamp one leaf in a corner. Use the same design on every mat.
4. Let the paint dry fully before setting the table.
5. Add a plate, folded napkin, mini pumpkin, and small glass candleholder.
Leave plenty of blank space so the paper looks intentional instead of crafty. Write each guest's name directly on the mat for an easy place card. The paper protects the table, simplifies cleanup, and can be recycled after dinner.
FAQs:
- Can grocery bags work? Yes, cut along the seams and use the unprinted side.
- Will spills ruin them? Large spills can, so keep spare mats nearby.
- Is paint required? No. Plain kraft paper looks polished with linen and simple dishes.
5. Use Mini Pumpkins as Place Cards
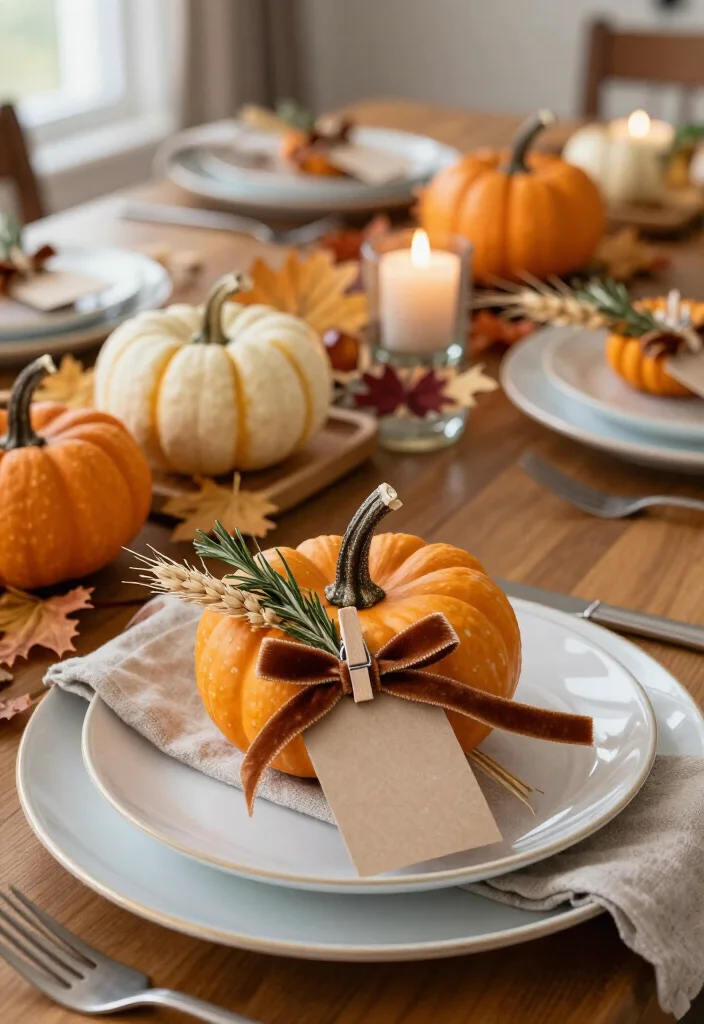
Mini pumpkins turn each place setting into a small seasonal gift. Choose cream, pale green, tan, or classic orange varieties, then add a handwritten tag and a simple ribbon. The result feels festive without looking too playful, and guests can take the pumpkins home after dinner.
Materials:
- 1 mini pumpkin or gourd per guest
- Blank cardstock tags
- Velvet ribbon or jute twine
- Small wooden or gold-colored clips
- Black, brown, or white paint pen
- Optional rosemary, wheat, or bay leaves
Steps:
1. Wipe each pumpkin clean and choose pieces with flat bottoms.
2. Cut cardstock into small rectangles or leaf shapes.
3. Tie a loose ribbon loop around each stem or attach a tiny clip.
4. Write the guest's name clearly and add a short dried sprig if desired.
5. Place the pumpkin above the plate or beside the fork, leaving room for glasses.
For a polished table, keep every ribbon the same color even when the pumpkins vary. A cream pumpkin with rust ribbon feels classic, while orange and white pumpkins create a brighter harvest look. Set pumpkins on felt circles if they wobble.
FAQs:
- Can guests take them home? Yes, as long as they stay away from hot candles.
- How long do whole mini pumpkins last? They can last several weeks in a cool, dry room.
- Where can I buy them cheaply? Check grocery produce bins instead of specialty decor aisles.
📹 Related Video: DIY Thanksgiving Pumpkin Place Cards
6. Wrap Napkins with Velvet Ribbon
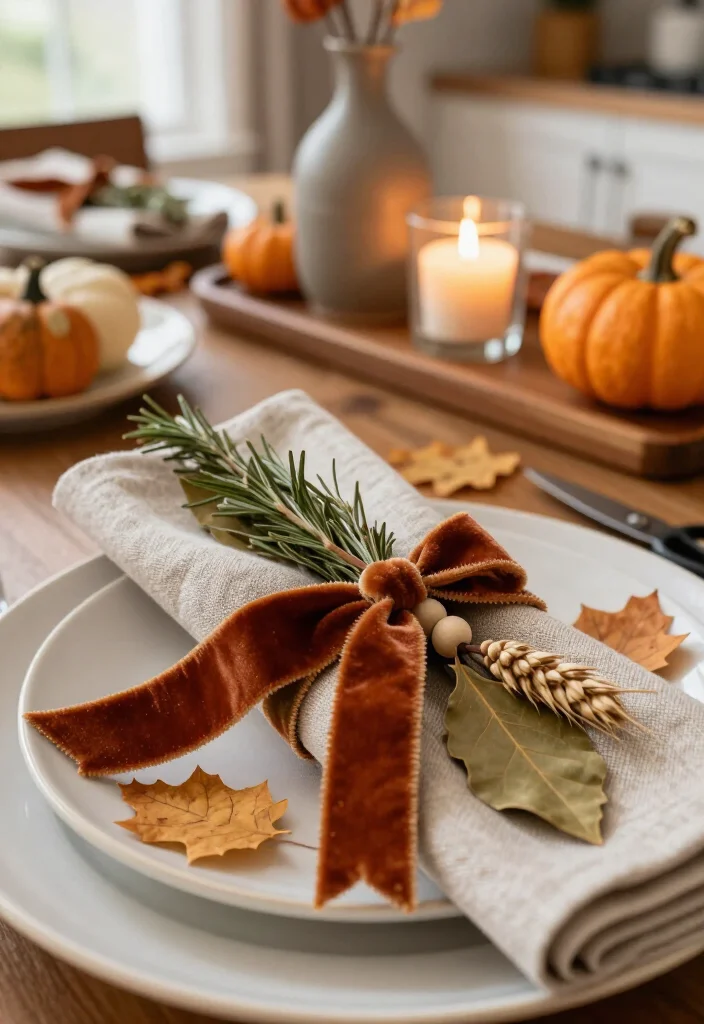
A ribbon napkin wrap adds softness and color to even the simplest table linens. Velvet catches the candlelight and feels especially inviting beside wood, pumpkins, and dried leaves. You only need a short ribbon piece and one small natural accent to make each setting look carefully finished.
Materials:
- Neutral cloth or thick paper napkins
- Velvet ribbon in rust, olive, cream, or brown
- Sharp scissors
- Dried rosemary, wheat, eucalyptus, or bay leaves
- Optional wooden beads or paper leaves
Steps:
1. Cut a 14-inch ribbon sample and test it around one folded napkin.
2. Fold each napkin into a rectangle or roll it loosely.
3. Wrap the ribbon around the center and tie a knot or small bow.
4. Trim the ends at an angle for a neat finish.
5. Slide one short dried sprig under the ribbon and place the napkin on the plate.
Use one ribbon shade throughout the table so the look feels edited. If velvet is unavailable, try cotton twill, satin, burlap, or fabric cut from an old scarf. Keep herbs short so they do not brush against guests or food. Store the finished ribbon pieces flat for another holiday.
FAQs:
- Can paper napkins work? Yes, choose thick neutral napkins and tie them loosely.
- What if the ribbon slips? Add a tiny hidden piece of removable fabric tape.
- Can I use fresh herbs? Yes, add them shortly before dinner for the best scent and color.
7. Create a Dollar-Store Gold Tray Arrangement
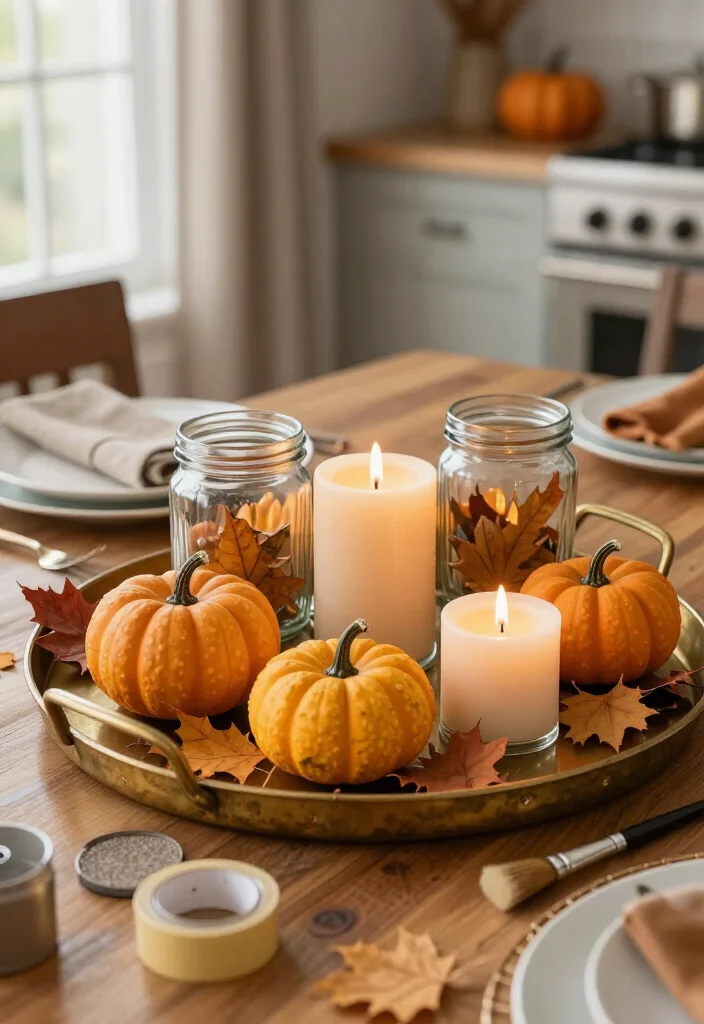
A plain discount-store tray can become the polished base that makes inexpensive decor look intentional. A soft gold or aged-brass finish adds a small flash of shine, while pumpkins, glass jars, and foliage keep the arrangement grounded. This project is affordable, customizable, and perfect for a mantel or dining table.
Materials:
- Plain plastic, metal, or wood tray
- Metallic gold or champagne spray paint
- Fine-grit sandpaper
- Painter's tape and newspaper
- Clear matte sealer
- Mini pumpkins, candles, jars, and dried leaves
- Optional brown craft paint
Steps:
1. Wash and dry the tray, then lightly sand glossy areas.
2. Cover handles or sections that should remain unpainted.
3. Spray two or three thin coats outdoors, allowing each coat to dry.
4. Dry-brush a little brown paint around the edges for an aged finish.
5. Add matte sealer and let the tray cure fully.
6. Fill it with two jars, one candle, three pumpkins, and a few low stems.
Keep the tray as the only shiny element. Matte wood, glass, and natural textures prevent the display from looking too bright. Never place a hot serving dish on a painted plastic tray.
FAQs:
- Will paint stick to plastic? Sanding, plastic primer, and thin coats give the best result.
- Can I paint indoors? Outdoor work is safer, especially with spray products.
- What makes it look expensive? A limited color palette and varied heights do most of the work.
8. Mix Thrifted Brass Candlesticks
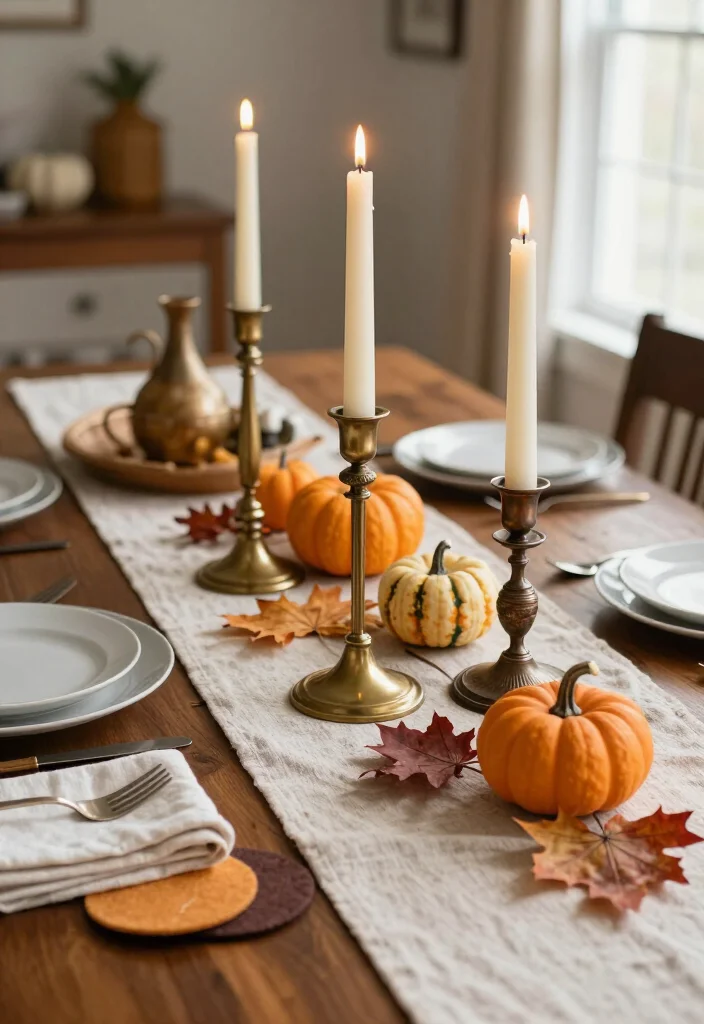
A group of thrifted candlesticks adds height, shine, and old-world character to a Thanksgiving table. Matching pieces are not necessary. When the candles share one warm color, a mix of brass, bronze, and worn gold looks collected instead of mismatched.
Materials:
- 3 to 5 thrifted candlesticks
- Cream, ivory, or beige taper candles
- Soft cloth and mild cleaner
- Felt pads
- Autumn leaves, pumpkins, and a simple runner
- Optional brass spray paint
Steps:
1. Check every holder for loose parts, sharp edges, and a stable base.
2. Clean away dust while keeping attractive patina.
3. Place the tallest holder toward the center or back.
4. Arrange shorter holders around it in a loose triangle.
5. Add felt under each base and secure candles snugly before styling.
6. Keep leaves and pumpkins several inches from every flame.
A single line works well on a narrow table, while a loose cluster suits a round table. Keep the arrangement low enough for conversation. If you serve family-style dishes, place the holders on a tray that can move easily.
FAQs:
- Can different heights look messy? Odd numbers and intentional spacing keep them balanced.
- Do the holders need to be real brass? No, plated metal and bronze work well.
- How can I stop tapers from wobbling? Wrap a thin strip of beeswax around the candle base.
Mix Thrifted Brass Candlesticks
Editor's Choice


You might also like

9. Give the Mantel a Neutral Pumpkin Makeover
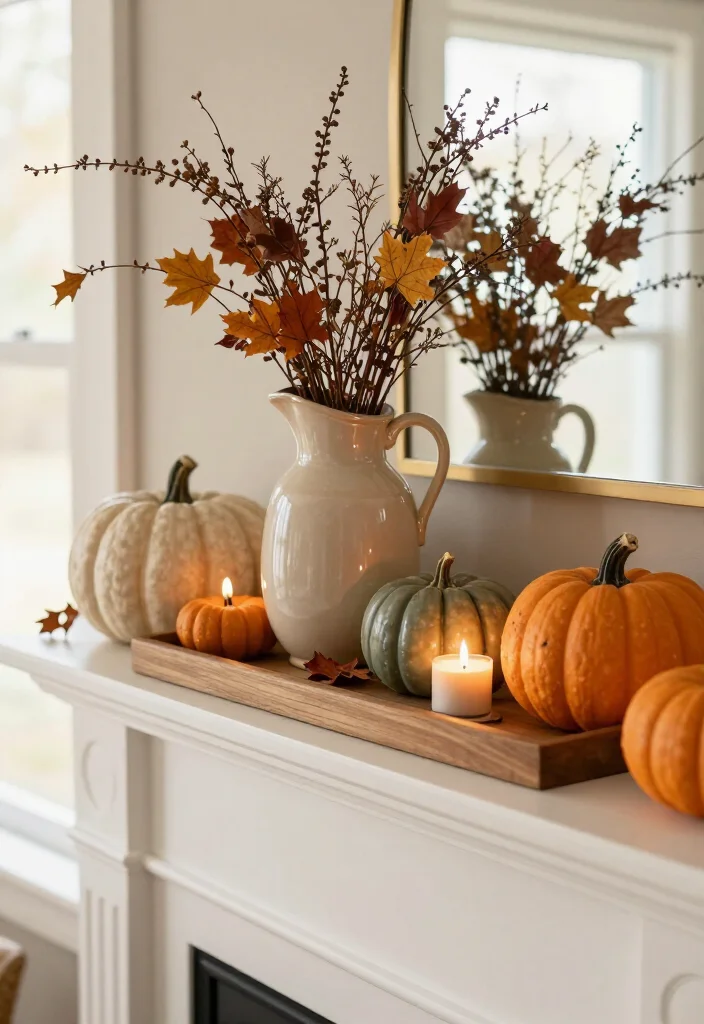
A neutral mantel can feel festive without covering the room in bright orange. Cream pumpkins, muted green stems, warm wood, and soft candlelight create a peaceful Thanksgiving display that works with modern or traditional rooms. The look is seasonal but calm, so it can remain in place for several weeks.
Materials:
- 4 to 8 pumpkins in cream, tan, muted green, or soft orange
- Large thrifted vase or ceramic pitcher
- Dried branches, eucalyptus, or faux maple stems
- 2 or 3 candleholders
- Narrow garland or folded linen runner
- Optional mirror or neutral artwork
Steps:
1. Clear and dust the mantel before arranging anything.
2. Set the tallest vase slightly off-center for movement.
3. Add branches that reach upward without blocking artwork or a television.
4. Group pumpkins in threes, using different sizes and colors.
5. Balance the opposite side with low candleholders.
6. Finish with a short garland or linen strip along the base.
Repeat colors already found in the room for a connected look. A mirror behind the arrangement can bounce candlelight and make the display feel larger. Use flameless lights near branches and fabric.
FAQs:
- Must every pumpkin be neutral? No, one orange pumpkin adds a welcome harvest note.
- How do I steady tall branches? Add stones or floral foam inside the vase.
- Can I use this idea without a fireplace? Yes, try a console, shelf, or entryway table.
❝ A few cream pumpkins, a thrifted pitcher, and candlelight can make budget Thanksgiving decor feel beautifully high-end. Layer neutral tones with dried branches or eucalyptus, then leave breathing room so your mantel stays festive, peaceful, and stylish for weeks.
10. Turn Mason Jars into Amber Votives
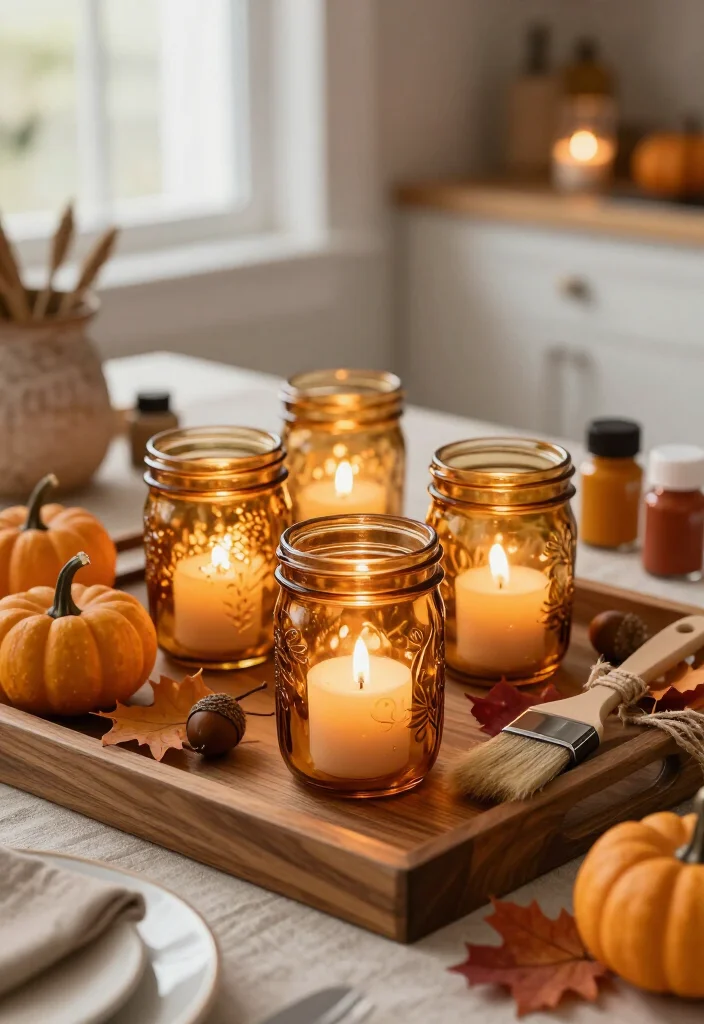
Amber glass turns ordinary jars into glowing little lanterns for a Thanksgiving table. The warm color softens candlelight and looks beautiful beside cream plates, brown wood, and dried leaves. Use one jar as an accent or group three, five, or seven on a tray for a stronger display.
Materials:
- Clean mason jars or recycled glass jars
- Transparent amber glass paint
- Foam brush
- Rubbing alcohol and lint-free cloth
- Battery tea lights or unscented votives
- Jute, raffia, or narrow ribbon
- Optional acorns and dried leaves
Steps:
1. Remove labels, wash the jars, and wipe the outside with rubbing alcohol.
2. Brush on a thin coat of amber paint without allowing drips to form.
3. Add a second coat after drying if you want deeper color.
4. Follow the paint directions for curing or baking.
5. Tie ribbon around the rim, keeping loose fibers away from real flames.
6. Add a battery light and arrange the jars with pumpkins or leaves.
For a lighter effect, paint only the lower half of each jar. Clear jars mixed with one amber jar create gentle contrast. Battery lights are the safest choice near children, pets, fabric, and foliage.
FAQs:
- Can food jars work? Yes, pasta, jam, and pickle jars are useful after cleaning.
- How many jars should I group? Three suits a small surface, while five or seven fills a table.
- Can the paint be removed? Some products scrape away, but always check the label first.
11. Hang a Corn Husk Wreath
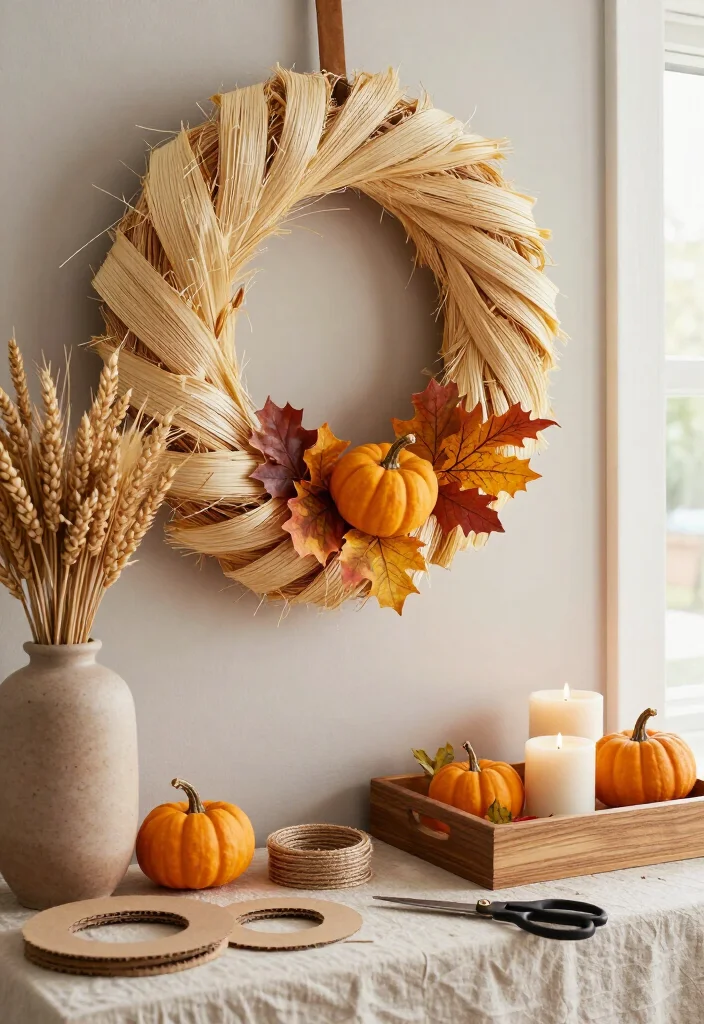
Corn husks add pale, feathery texture to a door or wall and cost much less than a finished wreath. Their soft color makes orange pumpkins and green foliage stand out without creating a dark, heavy display. The finished wreath feels rustic, light, and handmade.
Materials:
- Dried corn husks
- Straw wreath form or cardboard ring
- Floral wire or strong jute
- Hot glue
- Dried wheat, eucalyptus, or leaves
- Neutral hanging ribbon
- Scissors
Steps:
1. Sort the husks and discard any that are damp, moldy, or badly torn.
2. Cut a ring from sturdy cardboard if you are skipping a purchased form.
3. Layer husks around the ring with wide ends facing outward.
4. Secure each layer with glue or wire, overlapping until the base is hidden.
5. Add one small foliage bundle to one side rather than covering the whole wreath.
6. Attach a ribbon loop and hang it from a sturdy hook.
Gently curve and fluff the husks after the glue dries. Turn a few pieces in different directions so the wreath has movement. Keep it indoors or under a covered porch because moisture can soften the material.
FAQs:
- Can I use paper instead? Layered kraft-paper leaves create a similar shape.
- How long will it last? Several seasons when stored dry in a paper bag.
- Must it be round? No, a loose half-wreath feels fresh and takes less time.
12. Paint Gourds in a Soft Harvest Palette
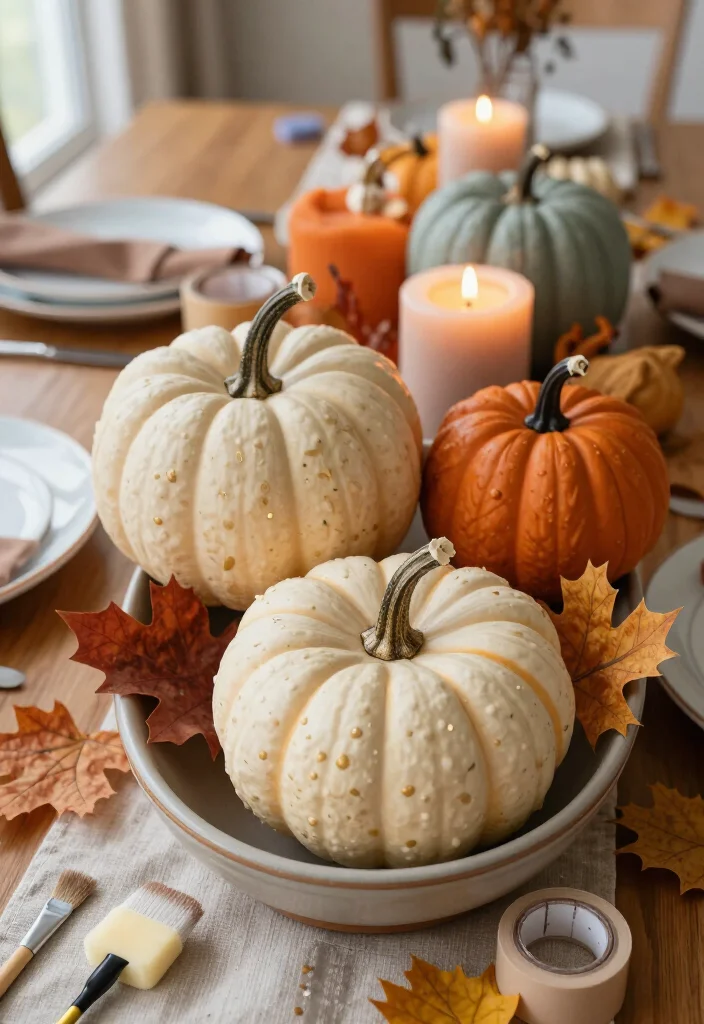
Paint gives inexpensive pumpkins and gourds a coordinated look without hiding their natural shapes. A palette of cream, clay, sage, and muted gold feels softer than bright orange and works in bowls, on shelves, or beside candles. Leave a few pieces natural so the display still feels connected to the harvest season.
Materials:
- Clean, dry pumpkins and gourds
- Chalk paint or matte acrylic paint
- Foam brushes
- Fine sandpaper
- Clear matte sealer
- Optional metallic paint and painter's tape
- Newspaper or craft mat
Steps:
1. Wipe each gourd clean and reject any that are soft, leaking, or moldy.
2. Lightly sand shiny skin and remove dust.
3. Apply one thin coat, let it dry, then add another if needed.
4. Add one simple detail, such as a stripe, metallic stem, or dipped section.
5. Seal the surface after the paint cures.
6. Group the finished gourds in odd numbers or scatter them around a centerpiece.
Matte paint feels more refined than a glossy finish because it highlights the ridges without making the gourds look plastic. Use leftover wall paint mixed with craft paint when you need extra coverage. Decorative painted gourds are for display only, not eating.
FAQs:
- Can I paint the stems? Yes, but leaving part of the natural stem adds texture.
- How long do they last? Whole, dry gourds can last for months.
- Can I create clean stripes? Use painter's tape and remove it while the paint is slightly soft.
13. Stack Pumpkins in the Entryway
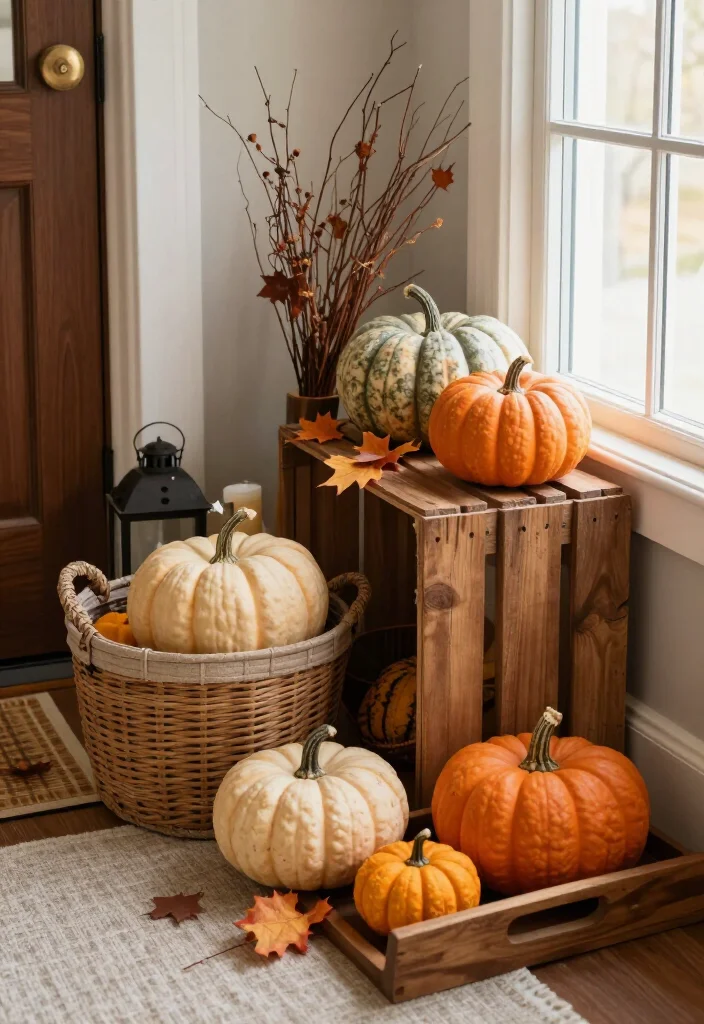
A vertical pumpkin display can make a small entryway feel welcoming without crowding the floor. Use a basket, crate, or sturdy stool as the base, then build upward with different sizes and colors. The layered shapes create a strong seasonal moment near a door, bench, console, or stair landing.
Materials:
- 3 to 5 pumpkins in varied sizes
- Thrifted basket, wooden crate, or wide planter
- Dried branches or faux leaves
- Neutral blanket or runner
- Sturdy stool or plant stand
- Optional battery lantern
Steps:
1. Choose a broad, stable base that will not wobble.
2. Place the largest pumpkin on the bottom with its best side facing the doorway.
3. Add smaller pumpkins one at a time, checking balance after each layer.
4. Tuck one short branch or leaf bundle beside the stack.
5. Add a lantern or basket at floor level, keeping the walking path clear.
Limit the palette to three main colors for a more polished result. Cream pumpkins with one muted orange piece look calm, while orange pumpkins with a dark basket feel richer. Protect real pumpkins from damp floors with a cork mat or shallow tray. Mix faux and real pieces for a display that lasts longer.
FAQs:
- How can I stop pumpkins from rolling? Use felt circles or folded towels beneath them.
- Can the display go outside? Only in a covered, dry area.
- Where can I find inexpensive pumpkins? Ask produce stands about slightly marked pieces.
14. Make a No-Sew Table Runner from Drop Cloth
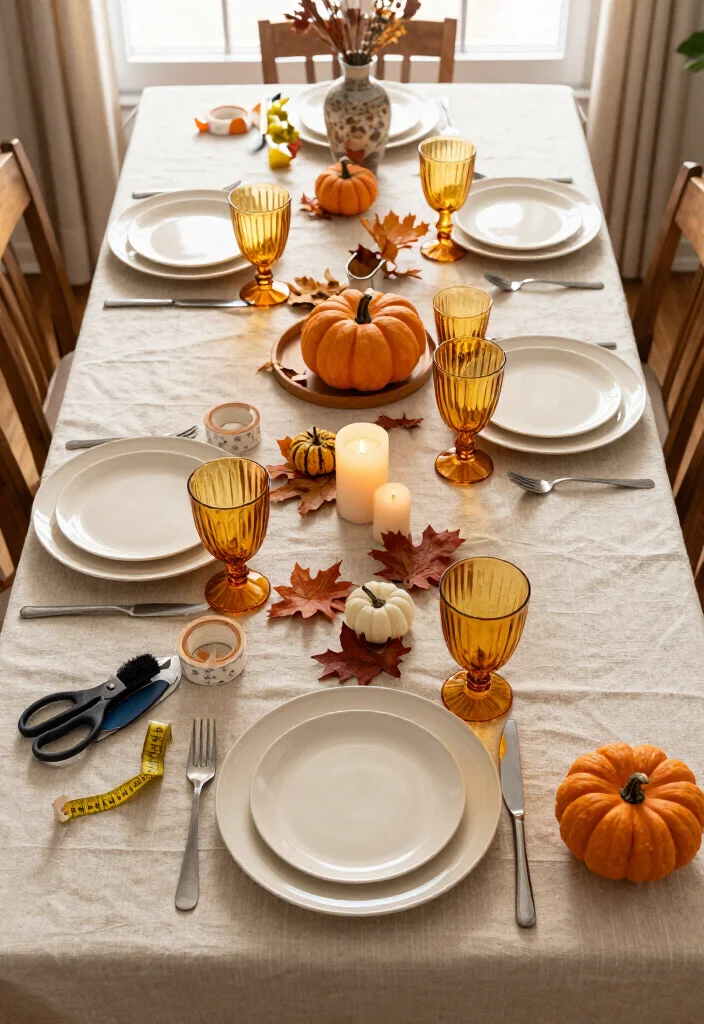
A cotton drop cloth gives you the look of a tailored table runner at a fraction of the price. Its sturdy weave lies flat, and the warm ivory color works with amber glass, rust leaves, and dark wood. You can leave it plain for a relaxed table or add a simple painted border.
Materials:
- Clean cotton drop cloth or canvas fabric
- Measuring tape and fabric scissors
- Iron and ironing board
- Fabric glue or iron-on hem tape
- Optional fabric dye or leaf stencil
- Neutral tableware and fall accents
Steps:
1. Measure the table and add about 18 inches for an overhang on both ends.
2. Cut the fabric straight, using a pulled thread as a guide if needed.
3. Fold each edge under half an inch and press it flat.
4. Secure the folds with hem tape or fabric glue.
5. Add a simple stencil border only after testing the paint on scrap fabric.
6. Place the runner beneath a low centerpiece and spread accents along its length.
A pale runner brightens dark wood, while rust leaves and amber glass add contrast to a light table. Slight fringe can look charming, so do not worry about perfect edges. Let the adhesive cure fully before washing or folding it away.
FAQs:
- Can an old sheet work? Yes, if it is thick enough and not sheer.
- How wide should it be? Twelve to sixteen inches suits most dining tables.
- Is fabric glue washable? Some products are, so follow the package curing directions.
You Might Also Like

15. Float Cranberries in a Glass Vase
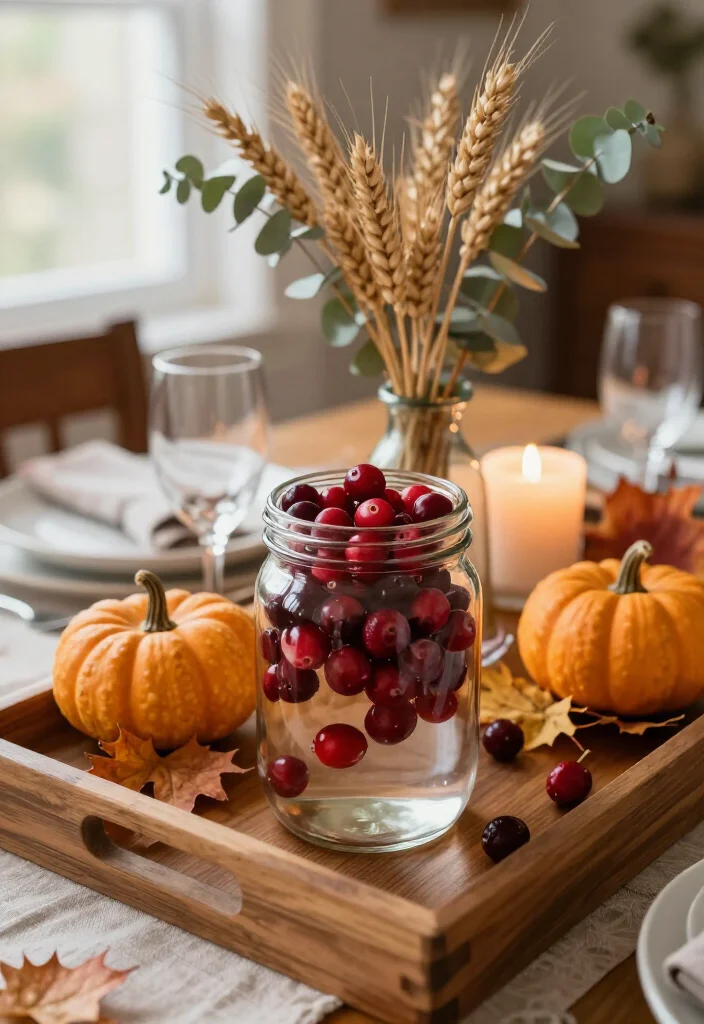
A clear vase filled with cranberries creates a bright, simple centerpiece that feels festive without needing a large bouquet. The glossy red berries contrast beautifully with cream pumpkins, pale linens, and brown wood. Add dried branches for height or use a smaller inner jar to hold a battery candle.
Materials:
- Tall clear glass vase
- Smaller jar that fits inside
- Fresh cranberries
- Water
- Battery tea light or waterproof floating candle
- Dried branches, wheat, or eucalyptus
- Wooden tray and neutral linen
Steps:
1. Set the smaller jar inside the vase and center it with a few cranberries.
2. Fill the space between the jars with berries to the desired height.
3. Add water to the inner jar for stems, or use a battery light without water.
4. Pour water slowly into the outer section if the vase is designed for it.
5. Add one or two airy branches to the inner jar.
6. Place the vase on a tray with pumpkins or folded linen.
Fresh cranberries usually last several days, but remove berries that soften or cloud the water. For a longer display, use faux berries or polished red beads. A thrifted cylinder, pickle jar, or tall storage jar can replace a specialty vase after labels and glue are removed.
FAQs:
- Can apples replace cranberries? Small red berries create a cleaner look, but citrus works for a short event.
- Will the water stain? It can, so always use a tray.
- Can I prepare it ahead? Assemble it the morning of the gathering for the freshest appearance.
❝ For budget Thanksgiving decor, tuck a smaller jar inside a clear vase, surround it with cranberries, and add a battery tea light for an instant centerpiece. The glossy red berries look especially elegant beside cream pumpkins and natural wood.
16. Frame a Botanical Fall Collage
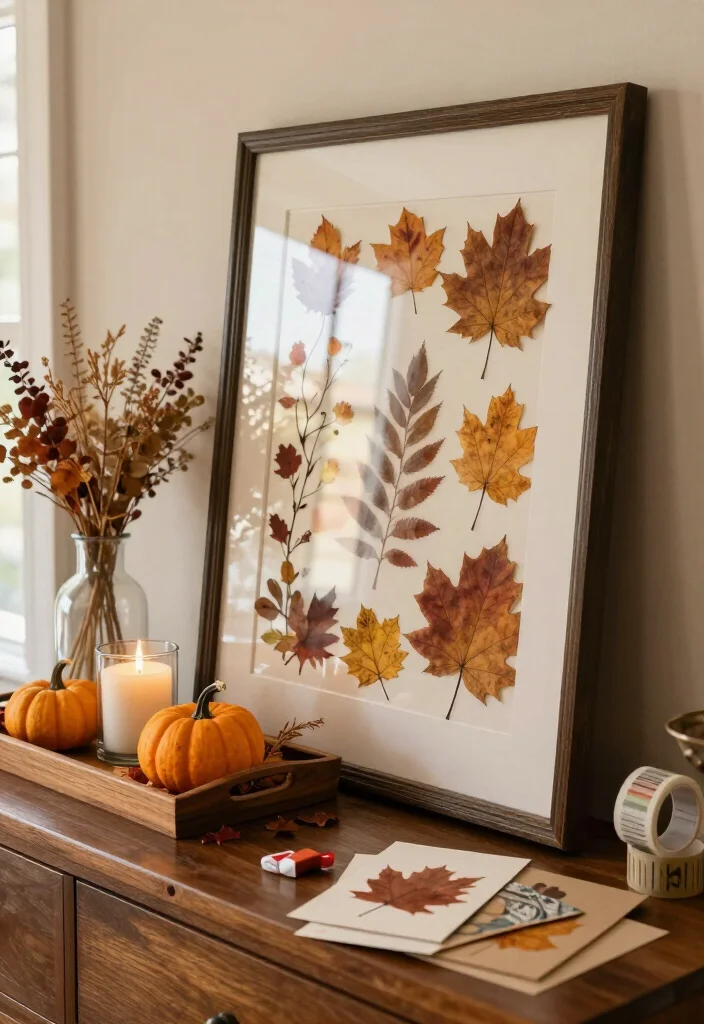
Pressed leaves can become graceful Thanksgiving artwork with little more than cardstock and a thrifted frame. One carefully placed leaf often looks more modern than a crowded collage, especially when surrounded by plenty of blank space. Hang one large frame above a console or arrange three smaller frames in a row.
Materials:
- 1 to 3 thrifted frames
- Pressed autumn leaves or dried fern pieces
- Cream cardstock or handmade paper
- Removable tape or adhesive
- Clean glass or acrylic panels
- Optional wheat, paper leaves, or craft paint
Steps:
1. Press fresh leaves between paper sheets beneath heavy books for five to seven days.
2. Clean the frame and glass, replacing damaged backing if needed.
3. Test several layouts before attaching the leaves to cardstock.
4. Secure each leaf with tiny pieces of removable tape.
5. Reassemble the frame and hang it near a mantel, sideboard, or entryway.
6. Add a small vase or pumpkin below to connect the art with the rest of the decor.
Repeat the frame finish across a group. Black frames feel dramatic, wood feels warm, and gold adds gentle shine. Keep the artwork away from direct sunlight because some leaves fade quickly. Cracked leaves can still work in smaller compositions.
FAQs:
- Can faux leaves work? Yes, flatten them under books before framing.
- Will liquid glue damage leaves? It can stain them, so use removable tape instead.
- How should I hang several frames? Use a level and keep the spaces even.
Frame a Botanical Fall Collage
Editor's Choice


17. Style a Basket Wall with Fall Foliage
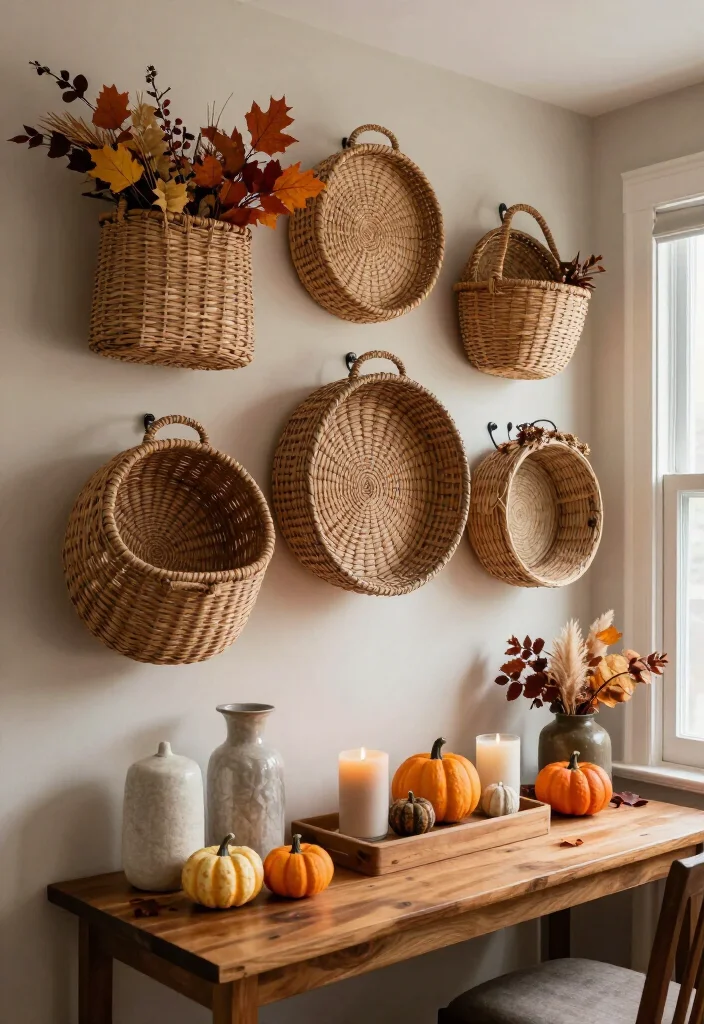
Woven baskets fill a blank wall with texture and bring a handmade feeling to your Thanksgiving decor. You do not need a large collection. Three baskets in varied sizes can create a strong arrangement above a console, bench, or breakfast nook. Add foliage to only one or two baskets so the display stays balanced.
Materials:
- 3 to 7 woven baskets
- Removable hooks or picture hangers
- Dried eucalyptus, wheat, palm leaves, or maple branches
- Floral wire
- Measuring tape and level
- Optional neutral ribbon and small pumpkin
Steps:
1. Arrange the baskets on the floor before touching the wall.
2. Place the largest basket in the middle or slightly off-center.
3. Leave enough space for each shape to remain visible.
4. Mark hook positions with removable tape and check the weight ratings.
5. Secure one loose foliage bundle inside a basket from the back.
6. Add a pumpkin, bowl, or vase on the furniture below.
Natural straw, honey brown, and dark seagrass work well together. If the baskets differ greatly, keep the foliage and lower display simple. This idea also helps fill a wide wall without the cost of large artwork. Hide a stained section against the wall or place foliage in front of it.
FAQs:
- Can I use removable hooks? Yes, when the basket weight fits the product rating.
- How much foliage is enough? One bundle in one or two baskets adds plenty of seasonality.
- Can renters try this? Yes, choose light baskets and approved removable hanging systems.
Style a Basket Wall with Fall Foliage
Editor's Choice


18. Fill a Wooden Bowl with a Loose Harvest Mix
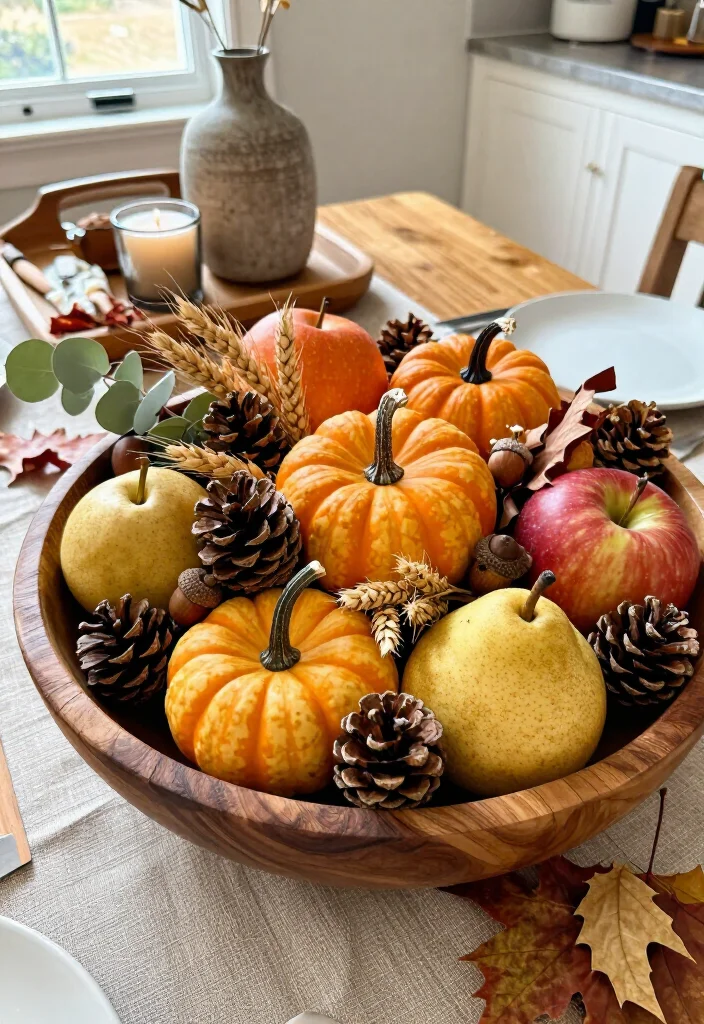
A wooden bowl filled with seasonal pieces may be the easiest Thanksgiving centerpiece to make. Pumpkins, apples, pinecones, gourds, and dried stems create a generous harvest look while leaving plenty of room for personal touches. The bowl can move off the table quickly when dinner is served, which makes it especially useful for busy gatherings.
Materials:
- Large wooden bowl or thrifted dough bowl
- Small pumpkins and gourds
- Apples or pears
- Pinecones and acorns
- Dried leaves, wheat, or eucalyptus
- Battery candle in a glass holder
- Optional linen, burlap, or wooden riser
Steps:
1. Clean the bowl and line unfinished wood with folded linen if needed.
2. Place the largest pumpkins toward the center or back.
3. Add fruit, gourds, and pinecones around the base for contrasting textures.
4. Tuck short stems into open spaces, keeping them below eye level.
5. Add a battery candle only if the bowl is wide enough, never a real flame.
6. Set the bowl on a runner or tray with space around it for serving dishes.
Let the center rise slightly while keeping the edges low. Repeat one color, such as cream or red, so the mix looks edited rather than random. Replace bruised fruit and use faux pieces when you want the arrangement to last all season.
FAQs:
- Can I use a metal bowl? Yes, though wood gives the warmest effect.
- How large should the bowl be? Choose one that leaves room around every item.
- Can I change it after Thanksgiving? Move the fruit to the kitchen and add pinecones or winter greenery.
Conclusion: Make the Table Feel Special, Not Costly
The best budget Thanksgiving decor usually comes from mixing what you already own with a few smart finds. A thrifted vase, dollar-store tray, grocery-store pumpkin, or scrap of ribbon can become the detail that makes the room feel warm and complete. Keep the colors connected, vary your textures, and leave enough open space for the people and food that make the holiday matter. Choose one project for this week, then save the rest for next year. That slow, collected approach keeps affordable holiday decorating fun instead of stressful, and it often creates a home that feels more personal than a room filled with brand-new decorations. Note: We aim to provide accurate product links, but some may occasionally expire or become unavailable. If this happens, please search directly on Amazon for the product or a suitable alternative. This post contains Amazon affiliate links, meaning we may earn a small commission if you purchase through our links, at no extra cost to you.
Frequently Asked Questions
How Can I Make Budget Thanksgiving Decor Look Expensive?
The secret to elevated budget Thanksgiving decor is choosing a simple color palette and repeating it throughout your home. Warm neutrals, soft creams, muted orange, and touches of metallic gold instantly create a polished look.
Use natural textures like pinecones, dried leaves, wood, burlap, and woven baskets to add depth without spending much. Grouping inexpensive items in odd numbers and displaying them on trays or cake stands can also make affordable pieces look thoughtfully styled.
For the biggest impact, focus on one or two statement areas, such as the dining table, entryway, or fireplace mantel, instead of decorating every surface.
What Are the Best Dollar Store Thanksgiving Decor Ideas?
Dollar stores are perfect for finding supplies for creative dollar store Thanksgiving decor. Look for glass vases, battery-operated candles, faux pumpkins, placemats, ribbon, floral foam, baskets, and seasonal signs.
Try filling a glass vase with mini pumpkins, painting plastic pumpkins in matte cream or gold, or wrapping inexpensive candleholders with twine and faux greenery. You can also turn a plain tray into a festive centerpiece with pinecones, leaves, and LED candles.
Choose a few versatile items rather than buying everything in one seasonal style. That way, your supplies can be reused for fall decorating, Christmas, or everyday home decor.
What Is an Easy DIY Thanksgiving Centerpiece on a Budget?
For an easy centerpiece, place a wooden board, thrifted tray, or shallow bowl in the middle of your table. Add a few small pumpkins, pinecones, faux autumn leaves, and battery-operated candles, then fill in the gaps with greenery or cinnamon sticks.
This simple arrangement is one of the most effective DIY fall decor projects because it requires very few supplies and can be customized to match your home. Vary the heights of the items so the display feels layered and intentional.
Keep the centerpiece low enough for guests to see across the table, and use flameless candles if you want a safer option for busy family gatherings.
How Can I Decorate My Thanksgiving Table Without Spending a Lot?
You do not need matching dinnerware or expensive linens to create a beautiful Thanksgiving table. Start with a neutral tablecloth, runner, or even a strip of burlap, then layer in cloth napkins, simple plates, and natural accents such as leaves, herbs, or pinecones.
For affordable holiday decorating, write guests' names on kraft-paper tags, tied twigs, or miniature pumpkins. Clear glasses can look instantly festive when paired with a sprig of rosemary or a fall-colored ribbon.
Borrow serving pieces, shop your home first, and mix thrifted finds with everyday dishes. A cohesive color scheme will make the entire table feel coordinated and more expensive.
How Can I Make Affordable Thanksgiving Decorations Last Beyond the Holiday?
Choose decorations that can transition easily from Thanksgiving into the rest of the fall season. Neutral pumpkins, woven baskets, amber glass, dried flowers, wood accents, and warm-toned candles are especially versatile.
After the holiday, remove turkey- or Thanksgiving-specific signs and keep the remaining pieces as affordable holiday decorating for an autumn mantel, kitchen shelf, or entryway. Store faux greenery and delicate accents in labeled boxes, wrapped in tissue paper to prevent damage.
You can also refresh the same decor next year by changing the ribbon, rearranging the centerpiece, or adding one new statement piece. This makes your budget Thanksgiving decor feel fresh without requiring a completely new collection.