

Planning a wedding is one of the most exciting adventures you can embark on, especially when that big day is set for summer 2026! With the sun shining and flowers blooming, this season offers a magical backdrop for your celebration. To make your wedding truly yours, why not dive into the world of DIY? Crafting your wedding elements allows you to infuse your personality into every detail. This post is filled with tips and ideas to help you create a stunning, memorable event that reflects your unique style. If you’re a couple eager to make your wedding day special without breaking the bank, you’re in the right place. Whether you're a seasoned DIYer or just starting, these tips are designed for you. You’ll find everything from personalized invitations to charming table settings, ensuring that your summer wedding is not only beautiful but also meaningful. Get ready to explore a treasure trove of DIY wedding tips that will help you express your creativity! You’ll learn how to add personal touches to your décor, create unforgettable favors, and even bake your own wedding cake. With these ideas, you’ll make memories that last a lifetime while saving money for your honeymoon.
Key Takeaways
- Personalize your invitations by crafting unique designs that reflect your style and set the tone for your wedding. - Create beautiful floral arrangements using local blooms, giving your wedding a fresh and personal feel. - Design your own wedding décor with rustic charm, using materials that resonate with your theme and personality. - Make thoughtful DIY wedding favors to show appreciation for your guests, adding a special touch they’ll remember. - Capture fun moments with a DIY photo booth, allowing friends and family to create lasting memories of your special day.Contents
- 1. Personalize Your Invitations: Crafting Unique Designs
- 2. Floral Arrangements with a Personal Touch
- 3. Create Your Own Wedding Décor: Rustic Charm
- 4. DIY Wedding Favours: Sweet Tokens of Appreciation
- 5. Craft Your Own Table Settings: A Personal Touch
- 6. Wedding Cake: Bake Your Own Sweet Adventure
- 7. Unique Ceremony Ideas: Make It Your Own
- 8. DIY Photo Booth: Capture the Fun
- 9. Capture Memories: DIY Wedding Video
- 10. Embrace the Unexpected: Flexibility is Key
1. Personalize Your Invitations: Crafting Unique Designs

Your wedding invitations are the first hint of the magic to come, so let’s make them stand out! Choose vibrant cardstock, elegant watercolor paints, or even delicate pressed flowers to elevate their beauty. Using user-friendly design platforms like Canva, you can craft invites that truly reflect your unique style. Adding a handwritten note to each invitation will make your loved ones feel extra special and appreciated.
Start by gathering your materials: cardstock, paints, and any embellishments you desire. Select a theme that complements your wedding colors, and either utilize online templates or unleash your creativity to design a layout from scratch. Don't forget to add those personal notes for a heartfelt touch!
Key steps to create your invitations:
- Gather beautiful cardstock and embellishments.
- Choose a color theme that matches your wedding.
- Design using templates or your own creativity.
- Include handwritten notes for personalization.
Your invitations can become treasured keepsakes, adding a meaningful touch to your wedding journey. Just remember to account for postage and delivery times to keep everything running smoothly.
Personalize Your Invitations: Crafting Unique D...
Editor's Choice


How To Choose DIY Wedding Décor
When planning your summer 2026 wedding, the right décor can make a huge difference. DIY wedding décor allows you to express your personal style while keeping costs down. Here are some tips to help you choose the best elements for your big day: 1. Theme and Color Palette Start by determining the theme and color palette for your wedding. This helps create a cohesive look throughout your celebration. Consider elements that reflect your personality and story as a couple, such as vintage, rustic, or modern themes. Choosing 2-3 main colors will guide your décor choices and ensure everything fits together beautifully.2. Size and Space Next, think about the size of your venue. Will you have an intimate gathering or a larger celebration? Measure the dimensions of the space to understand how much décor you'll need. For example, tall centerpieces can fill vertical space in a high-ceiling venue, while low arrangements may suit a smaller setting better. Use your measurements to draw a layout and visualize where each décor piece will fit.
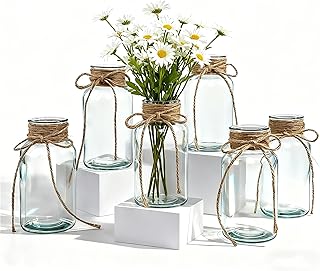
3. Materials and Sustainability Consider the materials you'll use in your décor. Many DIY projects can incorporate sustainable options, such as recycled materials or local flowers. This not only helps the environment but often saves money. For instance, glass jars can be repurposed for centerpieces, while burlap and lace offer a charming rustic touch. Evaluate what’s accessible in your area to reduce costs and ecological impact.
4. Budget Management Set a budget for your DIY décor projects. Identify how much you can spend on materials and tools. It's easy to get carried away, so prioritize your favorite items first. For example, if you want stunning floral arrangements, allocate more funds for those and save on simpler elements, like table runners. Keep track of expenses to ensure you stay within your limits.
5. Time and Skill Level Lastly, assess how much time you have to dedicate to DIY projects and your skill level. Some crafts may require more time or expertise than others. If you’re a beginner, start with simpler tasks like painting signs or creating table numbers. For more intricate projects, consider enlisting friends or family to help you. Allow plenty of time for practice and adjustments to avoid last-minute stress.
Pro Tip: Create a Pinterest board to collect ideas and inspiration. This visual guide will keep your vision consistent and make it easier to communicate your ideas with your DIY helpers. Also, remember to enjoy the process—crafting your décor can be a fun bonding experience with loved ones!
2. Floral Arrangements with a Personal Touch

Nothing brightens a wedding venue like stunning floral arrangements, and making them yourself is both rewarding and budget-friendly. Opt for seasonal blooms to ensure vibrant colors and freshness. Local flower markets offer a plethora of choices, just waiting for your creative touch!
Begin by selecting a color palette and theme that resonates with your love story. Gather a few friends for a fun floral arranging session, using mason jars, wooden crates, or vintage vases for a charming, rustic feel. You can also add personal touches, like family heirlooms, to make your arrangements even more special.
Here are some ideas to inspire you:
- Choose in-season flowers for freshness and vibrancy.
- Organize a floral arranging party with friends.
- Use unique containers like crates or vintage jars.
- Incorporate personal elements for added meaning.
Creating your own floral arrangements not only saves costs but also infuses your wedding with a layer of sentiment that store-bought flowers simply can’t provide.
Floral Arrangements with a Personal Touch
Editor's Choice


📹 Related Video: HOW TO MAKE a $15 Flower Arrangement with *only* TRADER JOES FLOWERS!
3. Create Your Own Wedding Décor: Rustic Charm

Rustic décor brings a cozy and inviting feel to your wedding celebration. Incorporate natural elements like burlap, wood, and twinkling lights for a charming ambiance. Crafting your own decorations can be a delightful project that fosters connections with family and friends.
Kick off your décor journey by making items such as wooden signs to guide guests, table centerpieces featuring mason jars filled with fairy lights, or DIY photo backdrops using wooden pallets or fabric drapes. Your creativity will shine through, creating an intimate atmosphere that reflects your love story.
Consider these fun DIY projects:
- Create wooden signage to direct guests.
- Craft centerpieces using jars with lights or candles.
- Design photo backdrops from pallets or fabric.
Allow your imagination to flow, and you’ll create an enchanting environment that feels uniquely yours.
4. DIY Wedding Favours: Sweet Tokens of Appreciation

Wedding favours are a lovely way to express gratitude to your guests, and crafting them yourself adds a personal touch. Think about delicious treats like homemade cookies, jams, or charming mini succulents that guests can cherish long after the celebration.
To design your favours, start by choosing a theme that resonates with your personality or wedding style. Collect clear bags or jars for packaging, and consider adding personalized labels. Including a small note that explains the significance of your favours will make them even more special.
Steps to create your favours:
- Select a theme that reflects your style.
- Gather clear bags or jars for packaging.
- Add personalized labels for a unique touch.
- Include a note explaining their significance.
These thoughtful favours will leave a lasting impression, reminding guests of the beautiful memories created on your special day.
Did you know that 75% of guests remember DIY wedding favours more than the cake? Handcrafted tokens—cookies, jams, or mini succulents—create personal keepsakes guests can treasure long after the celebration.
5. Craft Your Own Table Settings: A Personal Touch

DIY table settings showcase your personal style and create a warm, inviting atmosphere. Mixing various materials and personal items adds unique character to each table. You can incorporate photos of you and your partner, meaningful quotes, or family heirlooms for that extra sentimental touch.
To get started, think about using different styles of plates and cutlery for an eclectic look. Create personalized place cards with guests’ names and little notes about their importance to you. Adding seasonal flowers or greenery will bring a refreshing vibe to the table settings.
Ideas to inspire your table settings:
- Mix and match plates and cutlery for variety.
- Create personalized place cards for each guest.
- Use seasonal blooms or greenery for freshness.
Your creative flair will transform ordinary tables into memorable experiences for your guests.
You might also like


6. Wedding Cake: Bake Your Own Sweet Adventure

What could be sweeter than a homemade wedding cake? Baking your cake not only saves money but also adds a personal touch to your dessert table. This fun activity can be a bonding experience for you and your partner.
Begin by selecting your favorite flavors and determining the cake size. Consider a simple two or three-tier design adorned with fresh flowers or fruits for decoration. Make sure to practice your baking skills beforehand to ensure perfection on the big day.
Consider these tasty options:
- Choose your favorite flavors for a personal touch.
- Create a simple tiered design with fresh decor.
- Practice baking in advance for best results.
Additionally, think about making cupcakes or a dessert table featuring treats from family and friends to celebrate those you love.
DIY wedding tips show that baking your own cake is more than saving money—it's a sweet bonding ritual. Choose flavors you love, design a simple two- or three-tier cake, and practice ahead of time so your dessert table feels personal and polished.
7. Unique Ceremony Ideas: Make It Your Own

Your wedding ceremony should beautifully reflect your love story. Consider adding unique rituals or traditions that resonate with you as a couple. This could include writing your own vows, having a unity candle ceremony, or incorporating a lively musical performance.
Here are some creative ideas to personalize your ceremony:
- Hold a sand ceremony to symbolize your union.
- Include a personalized reading or poem that is meaningful to you.
- Consider a symbolic exchange that represents your relationship.
These personal touches will undoubtedly make your ceremony unforgettable, showcasing the love you share.
Unique Ceremony Ideas: Make It Your Own
Editor's Choice


8. DIY Photo Booth: Capture the Fun

A DIY photo booth is an essential addition to any celebration! This fun feature entertains guests while capturing lasting memories. With some playful props, a camera, and an appropriate backdrop, you can create a fantastic experience.
To set up your photo booth, choose a spot with great lighting. Create or find props that reflect your personalities, like fun signs, hats, or quirky glasses. Use a simple backdrop, such as a flower wall or colorful fabric, to enhance the theme.
Tips for a successful photo booth:
- Select a location with good lighting for clear photos.
- Gather fun props that showcase your personalities.
- Use a vibrant backdrop that fits your theme.
This interactive element encourages guests to unwind and enjoy themselves while capturing those precious, candid moments you'll treasure forever.
You Might Also Like


9. Capture Memories: DIY Wedding Video

Creating your own wedding video is a beautiful way to relive your special day. This project allows you to capture all the unforgettable moments in a personal manner. Using a simple camera or even your smartphone, you can record key highlights throughout the day.
To ensure you capture everything, designate a friend or family member to film moments during the ceremony and reception. Encourage guests to share messages during the celebration. Later, you can edit these clips into a short video to reminisce over the wonderful memories.
Here’s how to create your video:
- Assign a friend to capture special moments.
- Encourage guests to record messages for you.
- Edit clips into a memorable highlight reel.
This DIY project not only saves on videography costs but also offers a fun way to connect with your loved ones.
DIY wedding tips: a smartphone video can become a timeless keepsake. Designate a friend to film key moments and invite guests to share messages—simple clips can be woven into a heartfelt highlight reel later.
Capture Memories: DIY Wedding Video
Editor's Choice


10. Embrace the Unexpected: Flexibility is Key

Planning a DIY wedding can be unpredictable, and that’s perfectly fine! Embracing flexibility opens the door to beautiful surprises on your big day. Whether facing unexpected weather or last-minute changes, maintaining a positive attitude will enhance your experience.
Keep in mind that having backup plans for outdoor ceremonies, like a tent or an indoor venue, can save the day. Be open to creative adaptations—sometimes, the best memories come from unplanned moments! Focus on the love shared with your partner and guests, and enjoy the journey.
Remember these tips:
- Prepare a backup plan for outdoor events.
- Allow room for creative changes and surprises.
- Focus on love and enjoyment throughout the process.
Ultimately, your goal is to celebrate your union, and a laid-back approach ensures a day filled with joy and lasting memories.
Embrace the Unexpected: Flexibility is Key
Editor's Choice


Conclusion

A DIY wedding is not just about saving money; it's about pouring your heart into creating unforgettable memories. The tips shared can help you add personal touches that will resonate with you and your guests. Embrace the journey, keep it fun, and remember that the day is about celebrating your love. At the end of the day, the moments you create together will be what you remember most. Note: We aim to provide accurate product links, but some may occasionally expire or become unavailable. If this happens, please search directly on Amazon for the product or a suitable alternative. This post contains Amazon affiliate links, meaning we may earn a small commission if you purchase through our links, at no extra cost to you.
Frequently Asked Questions
Question: What are some practical DIY wedding tips to create a stunning Summer 2026 celebration?
Start with a cohesive color palette and easy, heat-friendly decor that travels well for a Summer 2026 celebration. Choose DIY wedding tips that save time, like printable invitations, printable menu signs, and decor made from mason jars, garlands, and greenery. Build a focal point with a simple DIY arch or photo backdrop and batch-produce centerpieces to keep a consistent look. Create a quick 2-hour craft plan and delegate tasks to friends or family so you’re not stuck crunching at the last minute. Finally, plan for heat with battery-powered candles, UV-safe fabrics, and shade options to keep guests comfortable.
Question: How can I incorporate the latest Summer 2026 trends into DIY wedding decor?
Tap into summer 2026 trends by using sustainable greenery, dried florals, natural textures, and light, airy fabrics. Combine bold accent colors with soft neutrals for a modern yet timeless look. Create handmade signage, personalized details, and interactive elements like a guest photo backdrop or a DIY favor bar. Keep a tight scope to ensure your DIY elements feel intentional rather than cluttered.
Question: What are practical budget-friendly strategies to execute these DIY wedding tips without breaking the bank?
Start with a master list of must-haves and rank items by impact. Prioritize high-impact DIY projects, reuse decor across spaces, and buy in bulk when possible. Use digital invites and print-at-home programs to cut costs, and enlist friends to help with batch crafting. Set a realistic timeline and test-run everything to catch issues early, saving you from costly last-minute fixes.
Question: What’s a workable week-by-week prep schedule for a DIY outdoor wedding in Summer 2026?
Plan an 8–10 week runway from concept to celebration. 8–10 weeks out: define look, color palette, and core decor; confirm vendors and builds. 6–7 weeks: order materials and start crafting kits. 4–5 weeks: assemble signage, centerpieces, and favors; finalize seating map. 2–3 weeks: print programs, assemble day-of kits, and run a dry setup. 1 week: pack supplies, rehearse the layout, and designate a day-of coordinator or trusted friend to execute the plan.
Question: What safety and weather considerations should I plan for a DIY outdoor wedding in Summer 2026?
Weather can make or break an outdoor DIY wedding, so have a rain or heat contingency plan. Rent or set up a shaded area, stock hydration stations, provide sunscreen, and arrange bug protection. Plan for power needs with generators or battery-powered gear, and have a backup indoor or tented space if a storm hits. Pack task-specific day-of kits and assign a point person to handle weather changes and logistics.